A simple setup to enhance horseback jumping skills.
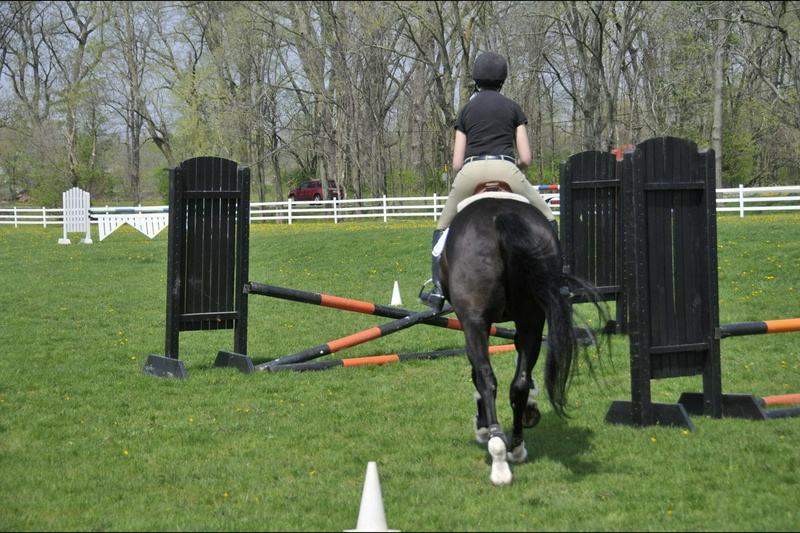
[PHOTOGALLERY uniquename=”galleria-azur”] At Findlay University, we have designed a jumping exercise for horses that is beneficial for all riders on our team, from beginners to advanced, in the disciplines of equitation, hunter, and show jumping.
We have named this exercise "Ins and Outs."
This exercise consists of a simple grid with three jumps: a cross-rail, a vertical, and an oxer.
Of course, this grid can be executed as a gymnastic exercise to improve your horse jumping style and allow you to focus on your body position while jumping.
But if you add a bit of creativity to it — that is, jump the obstacles at an angle and in a pattern resembling a continuous number eight — you arrive at an engaging training session that: improves the line of travel, as it requires you to align the center of the obstacles with points in the distance in your line of sight.
It teaches the skill of line selection, as it encourages you to use your eyes correctly throughout the exercise.
It improves the turning skill, as it asks you to have smooth and efficient turns from one obstacle to the next.
It helps you keep your horse balanced, as it teaches you to guide him from the inside leg to the outside rein.
It allows you to focus on the jump itself instead of worrying about getting over the obstacles, as the jumps are short and easy.
It teaches your horse to land easily on both leads after the jump, as turns in both directions are included in the exercise after the obstacles.
Through repetition, it helps you maintain a steady rhythm along the course without feeling the pressure of "finding the distance" for the obstacles.
Due to the novelty of the angled jumps and consecutive turns, it encourages your horse to pay more attention and jump in his best form.
It prepares your horse for equitation and show jumping classes; classes in which you must jump the obstacles smoothly and continuously at an angle.
It helps you identify and correct equitation faults, such as leaning forward when taking off, because every time such a mistake occurs, the fluidity of the exercise is disrupted.
Setting it up is easy and requires minimal equipment: four pairs of standards, 11 or 12 poles, and three cones or boxes for marking.
Arrange the grid exercise in a straight line in the middle of the arena.
(To ensure that these paths can be executed safely, your arena dimensions should be at least 100 by 150 feet.)
First, place a cross-rail, then 18 feet ahead, place a vertical, and then 21 feet after the vertical, place an oxer.
If you are working in an indoor space, reduce these distances to about 16.5 feet and 20 feet.
Adjust the height of the obstacles to a level that you and your horse are comfortable with.
For example, if you typically jump at a height of 2 feet 6 inches to 2 feet 9 inches, set the cross-rail at about 18 inches in the center, the vertical at about 2 feet or 2 feet 3 inches, and the oxer at 2 feet 6 inches and arranged squarely with parallel poles so that it can be safely jumped from both directions.
(You can also lower one side of each pole of the oxer to the ground at the start to give it the appearance of a wide cross-rail.)
On either side of each obstacle, place a ground line without any fillers like walls, flower boxes, or similar items.
I prefer to use colored poles, especially striped ones, because as I will explain later, these can be very helpful in maintaining balance and keeping you centered on the line.
I do not use natural poles, as it seems that horses do not see them well.
Make sure there is enough space around this grid so that you can make soft, curved turns from one obstacle to the next.
Then arrange three cones for "marking" so that each is five to six strides apart, meaning 60 to 72 feet, from the landing spot after the obstacle, as shown in Diagram 1 on the right.
Alternatively, you can place cans on the wall or fence of the arena.
Position each cone or can along the path you intend to ride, so that when you approach the center of the obstacle at a 45-degree angle, the cone or can is directly in your line of sight.
Finally, before saddling, walk the path you see in the diagram.
Follow exactly the line you intend to ride and use the obstacles around the arena to visualize the lines and turns.
At the same time, double-check that you can navigate each turn without hitting an obstacle or disrupting the flow of your movement.
If you are unsure, ask an experienced rider or coach to help you confirm that this path is safe and rideable.
Path Number 1: The basic path Before starting this exercise, warm up your horse thoroughly in walk, trot, and canter.
If you or your horse are beginners in jumping, first practice in another part of the arena, cantering and trotting straight towards a simple obstacle.
Before approaching the grid, make sure the horse jumps obediently and stays in front of your leg; that is, when you ask it to go forward, it responds quickly to your leg aids.
To start the "ins and outs" exercise, take the trot and move from left to right, in the direction that moves away from the two other obstacles of the grid, towards the cross-rail.
Align the center of the obstacle, that is, the intersection point of the poles, with a cone or can marking in a line.
Pass close to the base of the vertical obstacle with your right shoulder so that your horse has enough time to focus on the cross-rail before taking off (Photo 1).
Trot over the cross-rail while maintaining the 45-degree angle.
Keep the cone between the horse's ears before jumping, during the jump, and after it (Photo 2).
Throughout this exercise, avoid making the entry angle to the obstacles sharper.
This does not provide any additional benefit and can even be dangerous.
After landing, continue a few straight strides in canter.
If your horse lands on the left lead, that’s great.
If it lands on the right lead, bring it to the trot for a moment and then take the correct lead again, which is left; or if it is more experienced, perform a flying change.
While keeping your eyes up and following the predetermined line, initiate a soft left turn to return towards the grid (Photo 3).
Just as you would slightly reduce speed before entering a turn while driving a car, you should also reduce speed slightly when entering the turn.
Then, as you exit the turn and find your line towards the next obstacle, return to a steady rhythm without braking or speeding up.
In this turn and all other turns, consider the outside rein as both a guide and a brake.
If your horse gets too fast, give gentle half-halts with the outside rein to ask him to slow down without leaning on your hands.
Otherwise, maintain a steady contact to control the outside of the turn and prevent your horse from pushing his shoulder out and losing balance.
If he falls in the turn, use more of your inside leg to push him towards the outside rein.
Meanwhile, focus on maintaining a steady rhythm throughout the turn.
Listen to the sound of his hooves with each step and try to keep it as regular as possible.
It may help to count the steps in your mind or out loud; one, two, three, four.
And remember to take deep, calm breaths to keep yourself relaxed and focused.
Finish the turn at a distance that is far enough from the oxer and gives you enough time to straighten your horse.
To do this, balance the pressure of the reins and legs and keep your shoulders aligned with your horse's shoulders.
Look at the oxer and line it up with the landing cone, placing it again between your horse's ears.
Guide him to the center of the jump (photo 4).
As mentioned at the beginning of this article, if you are using striped rails, use the middle bar to your advantage and line it up with the marker cone.
Just as you approached the cross-rail, ride towards the oxer and think about rhythm, balance, and straightness.
Don't worry about the distance.
Whether the take-off point is a bit close, a bit high, or precise and correct, focus on staying on your line and keeping the ride smooth and fluid (photo 5).
Head towards the next cone and circle around it, then initiate the right turn (photo 6).
Again, if necessary, perform a flying change or change the counter canter through the trot.
After doing this exercise a few times, your horse will start to anticipate the turns and will likely land on the correct lead.
As soon as the vertical obstacle comes into view, line up its center with the landing cone (photo 7).
Jump (photo 8) and after landing, continue with a straight canter, passing just to the right of the cone and then gently bring your horse back to a walk.
After you have ridden this course a few times, also execute its mirror image.
If needed, move the cones or have a second set of them set up from the beginning.
You can increase the difficulty of this exercise for both yourself and your horse by shortening the distance between the jumps and cones, but not shorter than about 36 feet.
However, still ensure that you ride straight lines towards the center of the obstacles, jumping each one at an angle of about 45 degrees and allowing your horse to take a few steps on a straight line after landing before asking for the next turn.
Once you master this stage, you can perform this exercise without the help of the cones for further testing.
Course number 2: Adding a transition If you are participating in equestrian or show jumping competitions and feel comfortable and confident so far, try a version of this course by adding a downward transition (refer to Chart 2 on the right).
This exercise is an excellent test of patience and control.
Equestrian riders face tests like this in the competition arena, but it is a useful challenge for horses and riders in all disciplines.
Remember that the essence of the matter is riding on the line of the course, maintaining a steady rhythm, and most importantly, communicating with the horse so that the turns and downward transitions are smooth and fluid.
Start by cantering over the oxer from right to left and on the return path towards the grid.
Make a circle to the right around the cross-rail and stay relatively close to it to jump the vertical, then turn left around the oxer, again staying relatively close, and adjust your line for the cross-rail.
Immediately after passing over the oxer, ask your horse to come down to a walk softly, then jump the cross-rail from the walk.
Try to maintain a true walk and four beats, and do not anticipate the jump by leaning forward or closing your legs too soon.
This article was first published in the December 2008 issue of Practical Horseman magazine.
Source: Practical Horseman – Training