L'importance d'utiliser les jambes avant les mains en équitation
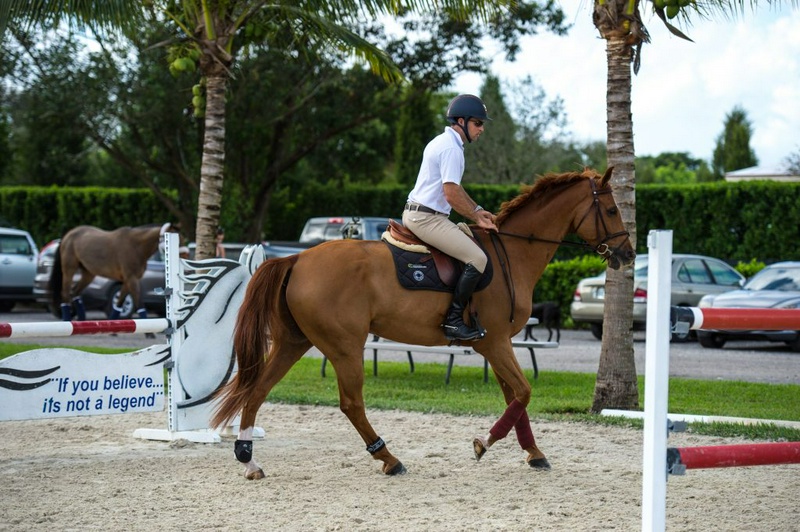
L'un des principes importants de l'équitation à tous les niveaux et dans toutes les disciplines est que l'utilisation des rênes ne doit pas se faire sans l'utilisation des jambes.
De nombreux entraîneurs simplifient l'utilisation des aides équestres lors de l'enseignement des principes de base et disent aux gens d'utiliser leurs jambes pour avancer et les rênes pour tourner et s'arrêter.
Cependant, cette habitude est si difficile à surmonter que si vous apprenez en tant que débutant à utiliser les rênes sans les jambes, il sera difficile de la corriger.
C'est pourquoi je crois que tous les cavaliers devraient apprendre dès que possible comment utiliser les jambes avec les rênes.
Je dis cela d'après mon expérience personnelle en tant que cavalier qui a dû réapprendre à utiliser correctement ses jambes.
Dans cet article, j'expliquerai pourquoi ce concept est si important et je proposerai trois exercices simples pour tester et améliorer l'utilisation de vos jambes et la réaction de votre cheval à celles-ci.
Utiliser les jambes avant les rênes pour un meilleur équilibre, utiliser les rênes sans les jambes est comme essayer d'arrêter un vélo en utilisant le frein avant sans le frein arrière.
Si vous faites du vélo à grande vitesse, il y a un risque de renversement.
De même, si vous utilisez uniquement les "freins avant" (rênes) sur votre cheval, il tombera en avant et deviendra lourd sur les rênes.
Ajouter les "freins arrière" (jambes) active ses postérieurs et l'encourage à marcher davantage sous son corps.
Cela l'aide à maintenir son équilibre tout en utilisant tout son corps pour répondre à vos commandes, que ce soit lorsque vous lui demandez de tourner, de faire un cercle ou de passer à une transition descendante.
Par exemple, si vous le tournez à droite, vous utilisez votre jambe droite pour demander à son corps de se plier dans le virage, puis vous ajoutez la jambe gauche pour le ramener sur une trajectoire droite après le virage.
De cette façon, il sortira du virage aussi équilibré qu'il y est entré.
Plus vous utilisez les aides manuelles sans les accompagner des aides des jambes, plus votre cheval aura tendance à tomber en avant et à devenir lourd sur les rênes.
C'est pourquoi de nombreux chevaux ont besoin de rênes de plus en plus fortes.
Les clients envoient souvent des chevaux avec de grandes rênes fortes pour l'entraînement dans mon écurie.
Cela peut sembler contradictoire, mais ces chevaux ont besoin de plus d'utilisation des jambes, pas moins.
Mon objectif est toujours de les renvoyer chez eux avec une simple rêne.
C'est la meilleure preuve que vous avez correctement entraîné un cheval à répondre aux aides des jambes.
Mon objectif avec chaque cheval est de monter davantage avec mes jambes et mon siège et de l'encourager à répondre au contact le plus léger des rênes.
Ici, le cheval westphalien nommé Casual Pleasure montre un mouvement équilibré et actif.
©Amy K.
Pour ce faire, vous devez créer une nouvelle habitude en vous assurant que chaque fois que vous utilisez vos mains, vous utilisez également vos jambes.
Même lorsque vous ne changez pas de vitesse ou de direction, vous faites probablement quelque chose avec vos mains, comme maintenir un contact léger avec la bouche du cheval.
Vous devez utiliser vos jambes de manière aussi constante.
Il devrait toujours y avoir au moins un contact léger entre vos mollets et les flancs du cheval.
Cela s'applique à tous les chevaux, peu importe à quel point ils sont chauds ou sensibles.
Conconcreto Believe, la jument avec laquelle j'ai gagné le Rolex U.S. Open Grand Prix à l'exposition équestre Central Park 2015, est un excellent exemple.
Elle a beaucoup de sang de race Thoroughbred, mais je dois encore la monter avec beaucoup de jambes.
Si votre cheval est très sensible, vous pouvez le monter avec des éperons plus petits ou sans éperons, mais vous devez savoir que l'utilisation de vos jambes est essentielle.
L'une des meilleures façons de tester si vous utilisez correctement vos jambes et si votre cheval répond correctement est de faire un mouvement de recul.
Un cheval qui recule docilement aux aides de vos mains et jambes sans signe de tension comprend vraiment vos aides.
En tant qu'avantage supplémentaire, l'exercice de recul engage, renforce et détend les muscles du dos de votre cheval.
C'est donc un excellent exercice à inclure dans son programme d'entraînement et de préparation.
Exercice 1 : Test Utilisez la technique suivante pour demander à votre cheval de reculer de cinq pas en ligne droite (Attention : si vous utilisez tout type de rênes auxiliaires ou d'équipements de restriction de la tête comme des rênes allemandes, un système de Gogue, un martingale fixe ou un chambon, ne le faites pas) : 1.
Commencez au pas.
Asseyez-vous calmement et équilibré au centre de la selle tout en maintenant un contact léger avec les rênes, gardant votre corps supérieur détendu.
2.
Ensuite, utilisez un peu plus les aides des jambes pour augmenter l'« intention » de votre cheval de se déplacer vers l'avant — créez une sensation qu'il se déplace plus activement vers les rênes.
La façon dont vous utilisez vos jambes et la force que vous appliquez dépendent de votre cheval.
Certains chevaux peuvent avoir besoin d'une pression douce avec vos mollets, tandis que d'autres peuvent nécessiter que vous tapiez plusieurs fois avec vos jambes ou vos éperons sur leurs flancs.
3.
Lorsque vous ressentez cette intention de mouvement vers l'avant, augmentez la pression sur les deux rênes de manière égale pour que votre cheval s'arrête, tout en continuant à utiliser les aides des jambes.
Imaginez que vous remplissez un pneu de vélo avec un trou.
Vos jambes introduisent de l'air dans le pneu.
Vos mains doivent appliquer une pression sur le trou pour empêcher l'air de s'échapper.
La quantité de pression que vous appliquez avec vos mains dépend de la quantité d'air que vous introduisez avec vos jambes dans le pneu.
4.
Lorsque votre cheval s'arrête, utilisez à nouveau vos aides des jambes et des mains de la même manière que pour l'arrêt, tout en gardant le reste de votre corps détendu et centré dans la selle.
Poussez ou tapez avec vos jambes tout en maintenant la pression sur les rênes pour empêcher son mouvement vers l'avant.
Continuez ces aides jusqu'à ce qu'il fasse un pas en arrière.
Ensuite, répétez les aides en utilisant vos jambes et mains droite et gauche de manière égale pour qu'il recule en ligne droite.
Lorsque vous appliquez ces aides de recul, un cheval typique fera l'une des trois choses : soit il recule, soit il avance rapidement, soit il résiste à votre main et bloque ses épaules, vous donnant l'impression qu'il est devenu une pierre.
S'il avance rapidement, appliquez plus d'aides des rênes.
S'il se fige, n'essayez pas de résoudre le problème par la force.
Il n'a clairement pas encore appris à reculer correctement.
Si vous le poussez davantage, il pourrait réagir de manière dangereuse, comme se cabrer.
Au lieu de cela, demandez à quelqu'un au sol de vous aider à effectuer l'exercice que je décris dans l'exercice 2.
Certains chevaux peuvent reculer seulement de deux ou trois pas avant de s'arrêter.
Ces chevaux sont bloqués dans leur corps car leurs muscles ne sont pas habitués à ce type de mouvement.
Ce mouvement peut même être douloureux pour eux, tout comme vos muscles vous feraient mal si vous n'étiez pas allé à la salle de sport depuis longtemps et que vous essayiez soudainement de faire un grand exercice.
Si votre cheval est bloqué de cette manière, avancez immédiatement et laissez-le détendre ses muscles.
Ensuite, arrêtez-le et demandez-lui simplement quelques pas de plus en arrière.
Ne le poussez jamais au point qu'il devienne agité ou contrarié.
1.
Pour tester la compréhension des aides de jambes par le Westfalen de 9 ans nommé Casual Pleasure, je fais un exercice simple de recul.
Je commence au pas, assis calmement et directement au centre de la selle, tout en gardant mon buste détendu et en maintenant un contact léger avec les rênes.
Ensuite, j'utilise un peu plus les aides de jambes pour créer une sensation de mouvement plus actif vers les rênes.
Il répond bien à ces aides, comme vous pouvez le voir par son postérieur bien engagé sous son corps.
©Amy K.
Dragoo 2.
Ensuite, avec un léger déplacement de poids de mon buste vers l'arrière et en augmentant la pression sur les deux rênes de manière égale, tout en continuant à utiliser les aides de jambes, je lui demande de s'arrêter.
Casual Pleasure a légèrement levé la tête au dernier moment avant de s'arrêter, mais je ne m'inquiète pas de cela.
Quand il est arrivé pour la première fois dans mon écurie, il était très faible et raide dans son dos.
Détendre les muscles de son dos était difficile.
Il est devenu beaucoup plus fort en peu de temps, mais je ne m'attends toujours pas à ce qu'il maintienne la forme plus arrondie et la position de tête relativement verticale d'un cheval plus avancé.
À ce stade, se concentrer sur la réactivité et l'activité de ses postérieurs est beaucoup plus important.
©Amy K.
Dragoo 3.
Lorsque Casual Pleasure s'arrête complètement, je relâche les rênes brièvement pour l'encourager pour sa bonne réponse à mes aides.
Sa tête est toujours haute, mais beaucoup de gens font l'erreur de se concentrer trop sur la position de la tête de leurs chevaux.
Cela peut être trompeur.
Un cheval avec la tête basse et arrondie peut toujours être faible et déséquilibré dans le dos.
Parmi les chevaux des cavaliers de haut niveau, il y a une grande variété dans la position de la tête.
Mais une chose que ces chevaux ont tous en commun, c'est l'utilisation active de l'arrière du corps.
©Amy K.
Dragoo 4.
Ensuite, en frappant mes jambes contre les flancs de Casual Pleasure et en appliquant simultanément une pression sur les rênes, j'empêche son mouvement vers l'avant.
Notez que je maintiens une ligne droite entre le coude et sa bouche et que j'utilise les deux mains de manière égale pour que mon intention soit parfaitement claire.
Bien que ce cheval ne soit pas avec moi depuis longtemps, nous faisons fréquemment des exercices de recul.
Il est donc bien familiarisé avec ces aides.
©Amy K.
Dragoo 5.
Il répond immédiatement par un pas en arrière.
Je répète les mêmes aides de jambes et de mains pour lui demander de reculer lentement et en ligne droite.
Encore une fois, à ce stade, je ne m'inquiète pas de la position de sa tête.
Il produit quelque chose de beaucoup plus important : une réponse obéissante à mes aides, un dos souple et arrondi, et une utilisation active de l'arrière du corps.
©Amy K.
Dragoo Exercice 2 : Apprendre au cheval à reculer pour améliorer sa compréhension des aides, si celui-ci refuse de reculer ou recule avec beaucoup de résistance, essayez cet exercice.
Ne faites cela que si vous êtes un cavalier expérimenté et que vous avez un bon équilibre.
Sinon, introduisez d'abord le concept sans monter ou demandez à un professionnel d'enseigner les leçons de base à votre cheval.
1.
Créez un parcours triangulaire avec deux obstacles verticaux espacés de 5 ou 6 pieds à une extrémité et se rejoignant à l'autre extrémité pour former la pointe du triangle.
Alternativement, vous pouvez former un triangle en utilisant une barrière ou un mur d'arène et un obstacle vertical placé en angle à côté.
Réglez la hauteur des sauts à 3 ou 4 pieds pour éviter que le cheval ne tombe dessus.
2.
La personne au sol se tient à la pointe du triangle et pointe une longue cravache vers le sol.
3.
Guide votre cheval au pas vers l'extrémité ouverte du triangle.
Avec les mêmes aides que j'ai expliquées précédemment, demandez-lui de s'arrêter à quelques pas de la personne au sol.
4.
Ensuite, utilisez les aides que j'ai expliquées pour demander à votre cheval de reculer.
En même temps, la personne au sol produit un son de "clac clac" et déplace la cravache en spirale sur le sol, juste assez pour que votre cheval soit légèrement surpris et fasse un pas en arrière.
Si le cheval ne recule pas, demandez à l'assistant de bouger la cravache plus près des jambes avant du cheval.
Si cela ne fonctionne pas non plus, tapotez doucement le poitrail du cheval avec la partie rigide de la cravache.
Soyez patient et veillez à ce que la situation ne devienne pas inconfortable ou stressante pour votre cheval.
5.
Lorsque le cheval fait enfin un ou deux pas en arrière, félicitez-le immédiatement et évitez d'utiliser les aides des mains et des jambes.
Ensuite, demandez-lui de faire un ou deux pas en avant pour détendre à nouveau ses muscles dorsaux.
6.
Répétez cet exercice plusieurs fois pour renforcer le concept.
Ensuite, terminez la séance pour la journée.
Avec de la pratique, vous pourrez effectuer cet exercice sans l'aide de la personne au sol et demander à votre cheval de reculer de plusieurs pas.
Concentrez-vous toujours sur le maintien du cheval droit et calme.
À mesure que ses muscles se renforcent, cela deviendra plus facile pour lui.
Il répondra également mieux aux aides des jambes en général.
1.
Une excellente méthode pour apprendre au cheval à reculer correctement en réponse à vos aides sans raidir son corps est d'utiliser un parcours fait de chandeliers et de barres.
Pour démontrer, je guide le cheval Casual Pleasure sur ce parcours temporaire et lui donne le temps de se détendre et de s'y habituer.
Mon assistant, Eric Molina, se tient directement devant nous avec une cravache pointée vers le sol.
©Amy K.
Dragoo 2.
Ensuite, j'utilise simultanément mes aides des mains et des jambes pour demander à Casual Pleasure de reculer.
En même temps, Eric produit un son de "clac clac" et déplace la cravache en spirale sur le sol, juste assez pour que le cheval fasse un pas en arrière.
Comme ce cheval particulier est déjà familier avec mes aides pour reculer, je n'ai presque pas besoin de pression des mains.
(Si ce cheval était moins expérimenté, j'utiliserais la pression directe et constante que j'ai montrée dans l'exercice 1.
) Dès qu'il commence à reculer, je relâche immédiatement les rênes pour l'encourager.
Eric s'approche de nous et est prêt à renforcer mes aides avec sa présence et sa cravache.
©Amy K.
Dragoo 3.
Si votre cheval ne recule pas immédiatement, demandez à votre assistant de toucher les jambes ou la poitrine du cheval avec la cravache, comme Eric le montre ici.
Notez à quel point Casual Pleasure semble à l'aise.
Il est très important de ne jamais effrayer ou déranger votre cheval pendant ces séances.
Pour bénéficier pleinement de l'exercice, il doit rester calme à la fois physiquement et mentalement.
©Amy K.
Dragoo 4.
Lorsque votre cheval recule enfin d'un ou deux pas, caressez-le immédiatement et arrêtez la pression de vos jambes et de vos mains.
Ensuite, demandez-lui de faire un ou deux pas en avant pour détendre les muscles de son dos.
Répétez cet exercice plusieurs fois pour renforcer le concept.
Si nécessaire, demandez à votre assistant de continuer à toucher sa poitrine ou ses jambes avec la cravache chaque fois que vous demandez au cheval de reculer, pour renforcer vos aides, comme Eric le fait ici.
Lorsque votre cheval recule bien avec l'aide de quelqu'un au sol, vous pouvez essayer de le faire seul.
©Amy K.
Dragoo Exercice 3 : Transition du trot à l'arrêt Lorsque le cheval recule bien, passez au niveau suivant et effectuez l'exercice de transition vers le bas, en lui demandant toujours d'avancer avant d'appliquer les aides de main.
Utilisez suffisamment vos jambes pour sentir que votre cheval prend le mors.
(Ne vous inquiétez pas d'en faire trop.
Vous ne pouvez jamais trop utiliser vos jambes.
) Ensuite, utilisez une pression égale des mains pour demander la transition vers le bas.
Commencez par des transitions simples comme du trot au pas et du Chaharnal au trot, puis progressez vers du Chaharnal au pas et du trot à l'arrêt.
Rappelez-vous, sans jambes, les mains sont inutiles.
1.
La transition vers le bas est un autre excellent moyen de renforcer la réponse correcte du cheval aux aides des jambes et de renforcer les muscles de son dos.
En préparation pour la transition du trot à l'arrêt, je ferme mes jambes pour demander la même intention d'avancer que dans l'exercice de recul.
Parce qu'ici j'ai aussi le mouvement en avant, il est plus facile de le garder rond tout au long de la ligne du dessus.
©Amy K.
Dragoo 2.
Ensuite, je transfère légèrement le poids de mon haut du corps vers l'arrière et je prends un peu plus de contact avec le mors.
Je continue à appliquer les deux aides de jambes et de mains pour...
©Amy K.
Dragoo 3.
... atteindre un arrêt équilibré et élégant.
Notez comment il garde son dos rond en réponse à mes aides de jambes et place ses deux postérieurs sous son corps.
©Amy K.
Dragoo À propos de Daniel Bluman Le cavalier de Grand Prix, Daniel Bluman, est né à Medellín, en Colombie.
Il a commencé à monter à l'âge de trois ans et a concouru pendant son adolescence en Colombie, en Allemagne et aux États-Unis.
En 2007, il a déménagé à Wellington, en Floride, et a commencé sa carrière en tant que cavalier professionnel.
Il a représenté son pays natal, la Colombie, aux Jeux équestres mondiaux en 2010, aux Jeux panaméricains en 2011 et aux Jeux olympiques de 2012.
En 2015, il a remporté le prix de 212 000 dollars U.S. avec le cheval Conconcreto Believe.
Le Grand Prix Open CSI*** a eu lieu à l'exposition équestre Rolex Central Park et l'année dernière, il a également participé aux Jeux olympiques avec le cheval Apardi.
Daniel attribue la plupart de sa formation à deux cavaliers olympiques légendaires, le Canadien Eric Lamaze et le Brésilien Nelson Pessoa.
Il passe maintenant la moitié de son temps à Bruxelles, en Belgique, et l'autre moitié à East Norwich, New York, où lui et son cousin Ilan dirigent leur entreprise, Bluman Equestrian.
Cet article a été publié à l'origine dans le numéro de janvier 2017 du magazine Practical Horseman.
Source : Practical Horseman – Training