Jumping practice with horses for better relaxation and balance
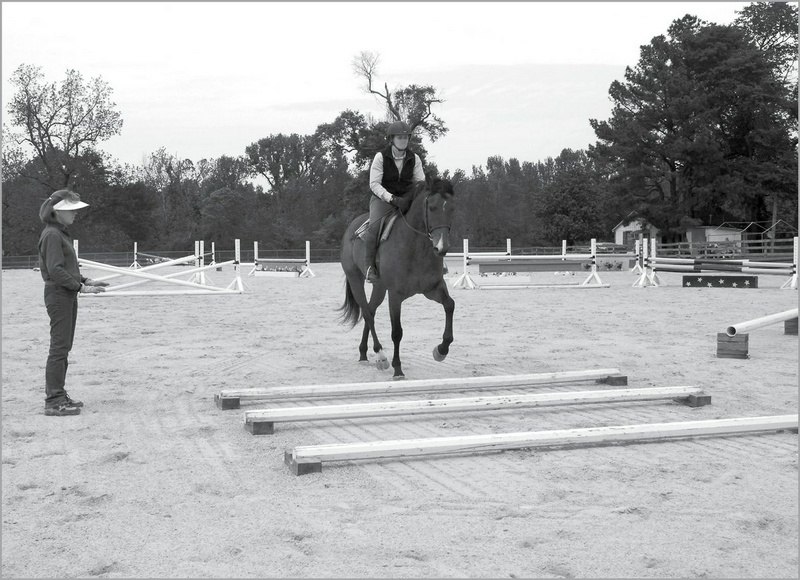
Many recognize Melanie Smith Taylor as the winner of the 1982 World Cup final and a member of the gold medal show jumping team at the 1984 Los Angeles Olympics, but she is also an advocate for horsemanship and riding that, according to her, "encompasses all aspects of the relationship between horse and human."
She considers ground work to be "the best way to learn and develop horsemanship and riding skills while building a solid foundation for all future interactions with your horse."
Melanie learned this educational perspective from renowned horsemen, Ray Hunt and Buck Brannaman, at their Wildwood Farm with her late husband, Lee, in Germantown, Tennessee, where they primarily focused on breeding and raising Thoroughbreds for polo.
In her new book titled Riding with Life: Lessons from the Horse, Melanie encourages riders, regardless of their level or discipline, to build a true partnership with their horses.
The book begins with her personal story, then addresses horse physiology, its natural instincts, and the fundamental principles of proper horsemanship and riding.
Next, it moves on to ground work and then to under-saddle work.
She concludes by explaining how to apply the correct principles of horsemanship and riding in show jumping.
In this section, adapted from Chapter 12, "Jumping Exercises," Melanie introduces two exercises that help horses jump with proper form, move in balance before and after the jump, and maintain their calmness and relaxation.
Circling to maintain calmness while riding in a circle has three main benefits.
First, for a horse that wants to speed up, this exercise helps calm it by continually forcing it to turn and keeping its gaze away from the destination.
On a straight line, the horse is more likely to anticipate and mentally disengage from you.
Second, by combining jumping with raised poles on a circle, you prevent the horse from anticipating the jump.
Third, practicing this maneuver in both directions helps it become proficient on both sides.
Horses should be able to approach the jump from either lead and land on either one.
Figure 1: Calming circles.
Place a jump head-to-head with a raised pole opposite three raised poles that are spaced 8 feet apart on a curve.
To keep your horse with you, alternate cantering over the poles and counter cantering over the jump or single pole.
If using a flat pole, convert it to an angled pole by raising the inside cup to encourage the horse to lift its inside leg slightly higher and land on the inside lead.
Exercise: Calming circles position a jump (cross or short vertical) head-to-head with a raised pole opposite three raised poles that are spaced 8 feet apart on a curve (Figure 1, above).
The inner distance between these three poles is 7 feet and the outer distance is 9 feet; therefore, depending on your approach, you will have different options for the number of strides.
You can lean towards the inner line to shorten the stride distance between the poles or go to the outer line to lengthen the strides and then return to the center line.
To help maintain a consistent diameter of the circle, place pairs of cones around the circle.
Start the exercise by passing over three raised poles in a canter; ensuring there are two strides between them, and then proceed over the raised pole in the inner line with a canter or counter.
Then, alternately replace the single pole with a jump.
It is always helpful to provide simpler options between the more difficult sections.
When you are ready, execute the entire exercise in a counter and pass over the three poles in a series of short jumps.
As the horse's body aligns with the circular shape, it is more likely to land naturally on the correct lead after the poles and jumps.
To keep the horse waiting for you, once pass over the poles with a canter and the single pole with a counter, and then again pass the poles with a counter and the single pole with a canter.
This way, the horse is engaged in multiple changes to maintain balance, and you also simultaneously develop your vision and release your arms to better feel the stride.
The calmer the horse becomes, the more gradually you will achieve a steady rhythm.
If you are using a straight pole instead of a cross-rail, convert it into an angled pole by raising the inner base cup.
This encourages the horse to lift its inside leg slightly higher and land on the inside lead; at the same time, it prevents it from drifting inward and dropping its shoulder inside; a good example of how to position the horse for success.
Transitions in gymnastics in the world of show jumping refer to a pattern of jumps designed to improve the horse's precision when taking off, enhance its intelligence between obstacles, and create a better style in jumping.
Gymnastics, consisting of several consecutive obstacles, often includes ground poles or raised poles that are purposefully placed before, between, or after the set.
You can execute this pattern as needed to identify the form or precision issues of the horse at the moment of takeoff, in the air, or during landing separately and achieve the desired corrections.
A layout that is well-planned is much more beneficial than a collection of scattered obstacles.
To achieve the best results, I incorporate transitions between strides as part of my gymnastics program.
Practicing transitions is never excessive, as it helps maintain the horse's balance and gives it the ability to adjust its stride.
In the following exercises, you are asked to perform multiple transitions and adjustments to improve the horse's balance and athletic ability before, over, and after each pole or obstacle.
Lengthening and shortening strides in this way prepares it much better for more advanced work.
It also stays more mentally engaged with you, reconnecting after landing and waiting for your guidance.
Exercise: Hourglass Shape 2: Hourglass Exercise.
This gymnastic exercise with a straight line and a curved line is a suitable option to execute after practicing on the circle.
The poles should be placed four to five strides away from the jumps and arranged at angles to the left, right, and straight ahead so that you can choose different paths after performing the gymnastic exercise.
1.
Hourglass: Counter over consecutive jumps in a curved line towards the jumps.
2.
Hourglass: Jumping from the gymnastic exercise in a straight line.
3.
Hourglass: Executing the transition to canter and selecting a straight line towards the raised poles.
As explained, alternating circular exercises with work on a straight line and curved line keeps your horse light, adjustable, and balanced.
This gymnastic exercise is a suitable option to perform after previous relaxation circles.
Here, you should place the raised poles both before and after the jump set in an hourglass pattern.
It is more practical to arrange the gymnastic exercise so that you can jump it in both directions.
The poles should be set four to five strides away from the jumps and arranged at angles to the left and right, as well as straight ahead, so you can change your path after executing the gymnastic exercise (Figure 2, above).
The hourglass pattern gives you a lot of flexibility, and the only limitation is your own creativity.
For example, one day set the distance between jumps for a consecutive jump of 10 to 12 feet, and another day for a stride of 18 to 21 feet; or use a combination of both with three jumps.
For the raised poles, place three poles in a straight line, 3 to 4 feet apart, before and after the jumps.
A set of closely arranged poles forces the horse to think about placing its feet and encourages it to transition to canter.
A contracted horse is more likely to ignore your aids and continue on a single pole in counter.
Then, at each of the left and right angles, before and after the jumps, place two raised poles 7 to 8 feet apart so the horse can pass over them in canter or counter.
Set the height of the poles to 6 or 12 inches.
You can approach both heights in canter or counter, but the 6-inch poles allow you to either pass over both poles in canter or jump in counter and exit with a consecutive jump.
Your horse should pass over the 12-inch poles, whether approaching in canter or counter, in a consecutive jump.
Start with canter towards each set of raised poles, then reduce speed or continue in canter or counter towards the jumps, and after landing, return to canter or continue in a soft counter.
After the jumps, you can go straight and then turn back to gymnastics on a curved line to the left or right, or first position on the curve and then return in a straight line.
Constantly changing stride and movement patterns keeps your horse soft, flexible, and completely in sync with you; it should not only respond to your feel and aids but also focus on the path you choose and correctly pass its feet over the raised poles before and after the jumps.
Most horses find it more challenging to slow down and shorten their strides than to move forward and lengthen their strides, as they naturally carry more weight on the front hand and must shift it back and onto their haunches when transitioning to slower strides.
The obstacles intensify this challenge, as the thrust force of the horse's jump upon landing transfers a significant amount of weight to its front legs.
When you keep the distances short in the raised poles and gymnastics section, as explained here, you not only help create a more uniform and balanced approach but also encourage a smoother and softer landing.
Riding with consecutive transitions in these exercises teaches your horse how to rebalance its weight to stay light on landing, and this helps you regain control.
You should also recover your body position as quickly as possible to reinforce this effort of the horse to regain balance and assist it.
If you do nothing and it focuses instead on the next obstacle, takes control, and stiffens against you, think again; bring it down to a trot or even a walk, and then start over.
When the horse thinks with you, not instead of you, it will be easier to guide it when you are going through a complete course at the canter.
During practice, always pay attention to the alignment of the horse's body.
Your target should be the center of each pole or obstacle, and exit the exercise in a straight line with discipline.
Even if you have gone left or right on a curve, ride a straight line out after that turn.
Every step matters equally.
After you have gone back and forth through this exercise a few times, stop the horse on a straight line.
Check the lateral alignment and longitudinal weight shift and make any necessary adjustments to place it within an imaginary rectangle in the center; this way, it can resume work with better balance and more self-carriage.
As you progress from crosses to vertical obstacles, as seen in the pictures below, open the ground lines (poles) about 2 feet out on either side of the obstacle.
Do not pull these poles out this far for oxers.
The ground lines help improve balance and adjustability of the stride further, as they shorten the stride between jumps and compress the distances from what is typically seen in a course.
This setup not only gives the horse more motivation to shift its weight back to separate evenly from the ground and draw power from the hind joints, but it also provides more space for it to raise the front part of its body higher and operate its knees more tightly and accurately; another example of how to let the exercise itself teach the horse to keep your aids softer and less intrusive while it focuses on the jump.
The ground line behind the obstacle helps it complete its jumping arc; because it encourages the horse to land further from the top pole instead of shortening the landing.
I often place a flower box in the middle of a single-stride combination, turning it into a double bounce to create variety and keep my horse alert and more precise in its footwork.
Exercise: Hourglass/Diagonal Lines Shape 3: When setting up exercise courses, you can switch between the hourglass arrangement (above) and diagonal lines (below) just by moving the raised central poles.
Both setups teach your horse to return to you after the jump and wait for guidance.
In both arrangements, four jumps are used; one in each quarter of the riding arena and two pairs of raised poles in the center.
This layout allows you to enter the line at a canter or trot, practice returning to a canter or walk in the middle of the line, and then resume the canter or trot for the third element of the line.
In this way, your horse learns to pay attention to you again after landing from each jump, making it easier to prepare him for the next obstacle.
When you reach a stage where you can navigate a line of obstacles without returning to a trot at a canter, adjusting the horse's stride will be done with minimal effort; because he has learned to land softly and wait for your command.
If this is not the case, return to practicing the transition in the middle of the line using raised poles to ensure you take a few strides at a trot.
As long as you are transitioning in and out of the trot, there is no need to measure an exact distance between jumps.
Note: When setting up obstacles, remember that the average canter stride is 12 feet, and you should add half a stride for both landing and takeoff.
For example, 60 feet is a four-stride distance (4 × 12 = 48) plus 6 feet for takeoff and 6 feet for landing.
But don't get too caught up in exact numbers.
This is just a general formula; you should also consider the height and type of obstacle as well as your rhythm of movement.
The taller the obstacle, the further the takeoff and landing points are; the wider the obstacle, the closer the takeoff and landing points are; and the faster the rhythm of movement, the longer the stride becomes.
Learn to approximate where your horse lands and where he takes off, and practice walking the distance between obstacles according to his stride; a human's long stride is about 3 feet.
When several people are simultaneously navigating diagonal lines, they must be mindful of each other and carefully pass by one another when crossing the center line over the raised poles.
In contrast, the hourglass layout allows several riders to practice simultaneously without worrying about their paths intersecting in the center.
(To ensure there is enough space for passing, be sure to place two pairs of central poles next to each other as shown.
) Another advantage of the hourglass pattern is its curved lines, which make transitions easier; because the horse cannot see the final target, and when you are positioned to jump over the raised poles on the ground, there is no obstacle directly in front of him.
When he is unsure of the direction of movement, he is more likely to wait for your command.
Additionally, the curvature of the line between obstacles allows you to adjust both laterally and along the path; therefore, using the inner or outer path, you can more easily add a stride or remove a stride.
For a more advanced version of both exercises, you can either remove the raised poles in the middle or replace them with obstacles so that the pattern becomes a line of three continuous obstacles at a canter.
Be sure to adjust the distance between each obstacle according to your horse's training level.
Start with short obstacles and change the distances as needed.
You can set two obstacles on the diagonal of the arena with half-stride distance to have the option to ride the line longer or shorter.
For example, a distance of 72 feet is typically covered in five strides, but if you set the distance to 78 feet, meaning you add 6 feet for a half-stride, you can cover it with six compact and steady strides or with five longer and forward strides.
When you reach a vertical obstacle from a cross-rail, place ground lines about 2 feet further out on both sides of the obstacle to enhance balance and adjustability: the ground line in front of the obstacle encourages the horse to shift its weight back and lift off the ground using its hind joints, while also giving it time to raise the front of its body higher.
The ground line behind the obstacle encourages the horse to complete the jump arc and not shorten the jump on the landing side.
Our collaboration in becoming a good rider requires something far beyond physical ability.
You need to have mental and emotional focus, along with motivation, will, and a constant readiness to learn from knowledgeable trainers; those who ignite your curiosity and passion.
Among the many talented riders around the world, those I respect the most are also top horse owners.
These individuals, who are thorough students of the horse, possess the necessary enthusiasm and discipline not only to ride well but also to care for their horses properly and manage them correctly, placing the horse's welfare at the center of all their activities.
The more I travel the world, the more I am amazed by the large number of horses and riders who have not had the opportunity to learn the fundamentals and basic skills of horsemanship.
Working with a horse without regard to these fundamentals inevitably leads to misunderstandings, and this, in turn, causes mental and physical tensions.
Over time, the horse becomes slow, fearful, or indifferent and may even develop physical problems.
As a result, the rider, feeling frustrated and vulnerable, turns to harsher bits and tools and stricter methods to regain control; or even completely gives up on the horse and buys another one.
No positive outcome comes from such a fruitless cycle.
In contrast, when we apply the methods that riding masters have used over the centuries, everything falls into place with lasting success and satisfaction for both the horse and the rider.
This humane and intelligent approach aligns with the horse's instincts and allows us to communicate effectively with it.
The essence of the matter is simple, but not easy: to build a lasting and harmonious relationship with the horse, we must correctly understand its valuable abilities and traits and reflect those in our behavior towards it.
When we cultivate these qualities within ourselves and present them to the horse, it becomes a respectful, eager, and willing partner that we can guide with balance and lightness.
One cannot expect the horse to eagerly enter our world without knowing what is natural and important to it.
The instinct for survival is its strongest instinct; therefore, it looks for these survival abilities in its companion and leader: keen observational power, excellent sense and timing, sharp understanding of balance, agility and vitality, and an unwavering discipline to protect the herd.
These are the fundamental bases for nurturing quality in the art of horsemanship and riding.
These principles apply to everything you want to do with your horse; not only in executing flatwork and jumping exercises to prepare for competitions, but also in groundwork, polo, and even making a ride on nature trails more enjoyable.
Working with a horse on the ground is the safest and most effective way to learn the skills and behaviors of a leader among equines.
Groundwork exercises, which are an important part of the daily routine of any equestrian, help to establish and maintain clear communication, trust, a mental and physical bond, and also a hierarchy in your two-horse herd.
When you transfer these good habits to riding, the potential to improve your relationship with your horse and succeed in any task or discipline you pursue will be limitless.
All essential leadership skills are interconnected like pieces of a puzzle, and each piece depends on the others to complete the picture.
This article was first published in the August 2015 issue of Practical Horseman.
Source: Practical Horseman – Training