Proper training for cross-country in eventing
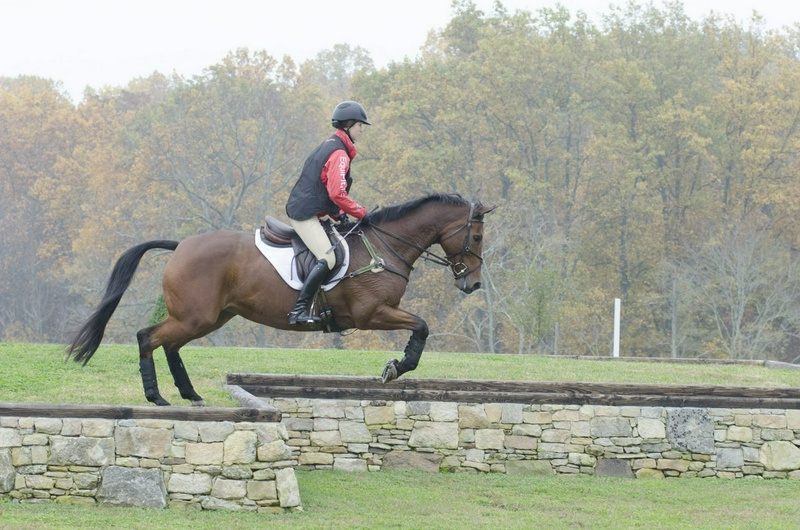
Eventing is a strange world.
We approach it for a simple reason: cross-country.
However, in order to enjoy those incredible moments of competition at Chaharnal, we spend endless hours cantering in circles to achieve a fleeting score of 10 in a dressage movement, or in the not-so-perfect world of show jumping, we futilely search for perfect strides.
Most eventing riders willingly pay this price to finally reach cross-country.
The irresistible thrill of cantering across open fields and jumping obstacles with a horse that enjoys this feeling as much as you do makes any price seem trivial.
But the reason I say eventing is a strange world is this: cross-country is both the most enjoyable and the most difficult to learn among the three phases, and it carries the most risk; yet, we do the least practice for it.
Moreover, many riders have concluded that the shift from the classic format to the short format has highlighted dressage and show jumping at the expense of weakening cross-country.
This conclusion was dangerously incorrect, and many paid a deadly price for it.
Recently, I have seen comments from senior international riders expressing regret over the elimination of the classic format.
They have increasingly come to realize that the removal of the classic format has correspondingly led to a loss of riding skills.
With this perspective, I want to provide a renewed overview of training and riding in cross-country.
Physical preparation, first and foremost, is that cross-country is the most demanding of the three phases of eventing and requires long-term planning and physical preparation.
I have recently noticed that more riders are struggling to maintain the physical health of their horses consistently.
I believe this issue is partly due to the four-season nature of eventing on both coasts and partly due to the tendency of riders to want to "keep the horse fit by competing."
Despite the criticisms I have of today's riders, I have no doubt about one characteristic: they have an extraordinary work ethic.
However, if they work smart alongside hard work, they will achieve better results.
Horses, unlike their human athlete counterparts, do not self-regulate, and for this reason, they are more prone to injury.
Unfortunately, the more talented and eager a horse is, the less likely it is to show its rider that it needs rest.
For this reason, when preparing the horses in my care, I always act with meticulous precision.
Before they practice cross-country, they have undergone 4 to 6 weeks of gentle preparation work and have gradually increased their workload enough to be able to canter a distance equivalent to twice the average length of the cross-country course at their level.
Then, jumping from obstacle to obstacle, I schedule the first cross-country training session 2 to 4 weeks before my horse's first competition.
(This training session replaces a day of physical training in its preparation program.)
There are three types of cross-country training: obstacle to obstacle, gymnastic cross-country, and short courses.
Each of these has a specific impact on your horse, and we will discuss each one.
Jumping practice is the easiest type of work for your horse in terms of physical pressure, and for this reason, after a long period without cross-country training or competition days, I use this method.
The jumping pattern is exactly what its name suggests; you walk between the obstacles, take a balanced canter, jump a single obstacle, and return to walking.
Start the canter far enough from the obstacle to have the time needed to find your rhythm.
After the obstacle, make sure your horse moves away from it at the same speed it approached.
Note that I said "canter," not "Chaharnal."
The practice in Chaharnal takes place in the later stages of this training process.
Before the season starts, in the horse's first encounter with cross-country work, I always practice at least one level lower than its competition level.
I want both of you to gain confidence, deepen your understanding of cross-country technique, improve your physical fitness, and enjoy the work.
I have worked under trainers who made their horses and riders calmly jump large training obstacles.
These sessions were almost always discouraging for the horse and rider, and I avoid such situations.
I also refrain from telling my riders to "get very close to the obstacle" or "stand very far away."
These terms refer to situations that differ from the theoretically correct distance; a distance that is usually defined as jumping from a point in front of the obstacle that is the same height as the obstacle — and if the obstacle has width in addition to height, half of its width is also added to this distance — and landing at the same distance behind the obstacle.
But remember that in practice, this does not always happen.
For someone to consistently and accurately predict the take-off point several steps before the obstacle, a lot of experience is required.
If you believe that every time you fail to predict the correct distance you will fail, you are right; you will fail.
For this reason, instead of insisting on accuracy, I insist on rhythm.
When you feel the rhythm, you also feel the balance, and when your horse is balanced, it jumps at its best level of ability.
It's that simple.
The art of stride adjustment — that is, the ability to predict and influence the number of strides remaining to the obstacle — is a skill that takes a long time to learn.
Until then, we need a riding and training system that is effective for less experienced horses and riders as well.
Now that we've talked about stride prediction, let’s discuss your eyes.
If you can't see the obstacle, you can't accurately gauge your stride either.
To measure the distance, you need to have a fixed reference point.
Look at the same point on the obstacle that your horse is looking at; that is, the top of the obstacle.
For a vertical obstacle, look at the top of the obstacle; for a parallel obstacle, look at the front pole; for a triple bar, look at the back pole; and for a hogsbach, look at the top pole.
Keep your gaze on that point on the obstacle until it goes out of sight between your horse's ears, and then look ahead.
If you look at the obstacle and maintain your rhythm, you are likely to have a good cross-country training session.
When planning the cross-country obstacles you want to jump, be sure to consider a bank, a ditch, and water as well.
(As you approach the bank uphill, look at the top of the bank, as if you are facing a vertical obstacle.
When jumping from the ditch, treat it like a triple bar and keep your eyes on the back edge of the ditch.
) The first few obstacles should be simple tree trunks on flat ground; after that, you can move on to obstacles that are slightly uphill or downhill.
In the first training session of the season, I do not practice many combinations.
We will postpone this section to the next cross-country session.
Then it’s time for cross-country gymnastics about a week to 10 days after the jump-by-jump training, my next cross-country session is something I call "cross-country gymnastics."
(Training with my horse continues according to the overall training plan.
) Since you are supposed to build this gymnastics piece by piece, you need a set of obstacles for this type of training.
Find one of your stable friends and swap tasks with each other.
Sometimes you learn more from the ground than from the saddle, so both roles will be interesting for you.
Depending on the local facilities where you are training, bring a pair of standards and a few poles next to a small bank, and place the same number of standards and poles next to a simple ditch; a ditch that has no tree trunk or pole before or after it; and do the same next to a water obstacle that has no tree trunk or pole blocking the way at its entrance or exit.
Warm up the horse's body by jumping over simple tree trunks, roll tops, and oxers; with the same approach you had in the first cross-country session.
You may have noticed where this type of training leads.
I place the standards with a pole on the ground, at the bottom of the bank and 18 feet from the edge of the bank.
If I have enough poles, I also place an adjustable pole on the ground, 9 feet outside the pole that is between the standards.
Unless you have a pony or a horse with a very short stride, plan to approach all these gymnastic exercises at a canter.
I want your horse to learn to jump with technique and power, not relying on speed.
When the poles are on the ground, go up and down the bank with the reins as loose as possible.
I want your horse to think for itself, and at the same time, going up and down the bank is a very good exercise to strengthen your independent position in jumping.
(Note: The first couple of times you jump up, hold the horse's mane.
This is harder than it looks, and I don’t want you to miss the movement.
) When your horse is calm and relaxed, while you are working on the back and forth, ask the obstacle group to raise the pole between the standards.
Keep the second pole on the ground.
This pole acts as the adjustable pole on the way up and helps maintain the horse's balance on the way down.
The distance between the pole and the bank is designed so that approaching at a canter is suitable in both directions.
Sometimes horses land so far from the bank when jumping down that instead of taking a step, they leap short over the pole.
Ask your obstacle team to place a third rail on the ground, in the middle of the path between the bank and the obstacle.
To solve this problem, do not increase the contact with the reins.
The more you pull on the way down, the more the horse raises its head and empties its back, making its jump wider.
When your horse calms down and jumps the jump with ease, gradually raise the height of the rail until it reaches the height of your competition level; for example, 3 feet and 3 inches for the training level, and so on.
The banks suitable for training usually have a height of 2 to 3 feet.
These are very good exercises for both your horse and yourself.
Keep the reins as soft as possible and make sure to move with the horse when jumping up, and on the way down, allow the horse to jump out from underneath you.
For variety, after working on the gymnastics bank, you can pass over a few simple logs and roll-tops at Chaharnal to re-establish the forward stretch and movement energy of the horse.
After that, walk towards the ditch; where you use the same training pattern and the same number of rails, and then, shortly after one or two fun obstacles at Chaharnal, you repeat the same pattern in the water jump.
In the water jump, for very inexperienced horses, I place the rail 18 feet from the edge of the water so they can jump on dry ground before entering or exiting the water.
For more experienced horses, I place the rail at the edge of the water.
When you become comfortable using cross-country gymnastics, the only thing that limits it is your creativity and your horse's training stage.
You can recreate any cross-country question you have seen in competition; just make sure to introduce it step by step, not all at once.
Now it's time for short courses after about another week of calm work, which will include dressage training, jumping with the horse, and also physical preparation, I will practice for the third time; this time with a short course approach.
Design two to three short courses that each last about 2 minutes and are covered at an approximate speed of 350 to 400 meters per minute.
Each course should include an easy jump to start, a simple question in a turn, and one of those three features you used in gymnastics.
For example, include a larger bank with a log on it or a simple bank combination in the course.
After that, come to one or two more obstacles with a smooth rhythm and then walk for a few minutes.
When your horse's breathing has almost returned to normal, start the second short course; this time with a ditch question, and again consider a rest period afterward.
Your third short course should include a water jump set, along with easy and confidence-building obstacles before and after the water.
Each of these three types of training methods has its own advantages and disadvantages.
Working obstacle by obstacle is the easiest method physically for the horse, but due to the nature of stopping and starting again, maintaining rhythm in it is difficult.
Cross-country gymnastics is very valuable for training the horse to face more complex combinations, but it places a lot of emphasis on collected canter and may make the horse somewhat dependent on the reins.
Short courses are an excellent option for improving physical fitness and rebuilding competition conditions.
However, if your horse is any bit fast and excited, this type of training pattern can push him too much forward.
Each of these patterns can be adapted to the temperament of the horse.
For example, retired racehorses should do more obstacle-by-obstacle and gymnastic exercises, as short courses can be very tempting for Thoroughbreds.
In contrast, slow and less active horses benefit from short sessions; training that both increases their physical fitness and awakens their spirit and responsiveness.
If dressage and jumping training is the price of reaching the goal, precise physical preparation and calculated practice ensure that when you finally get to go cross-country, the result and reward are even better.
Source: Practical Horseman – Training