4 exercises to relieve body stiffness and improve riding
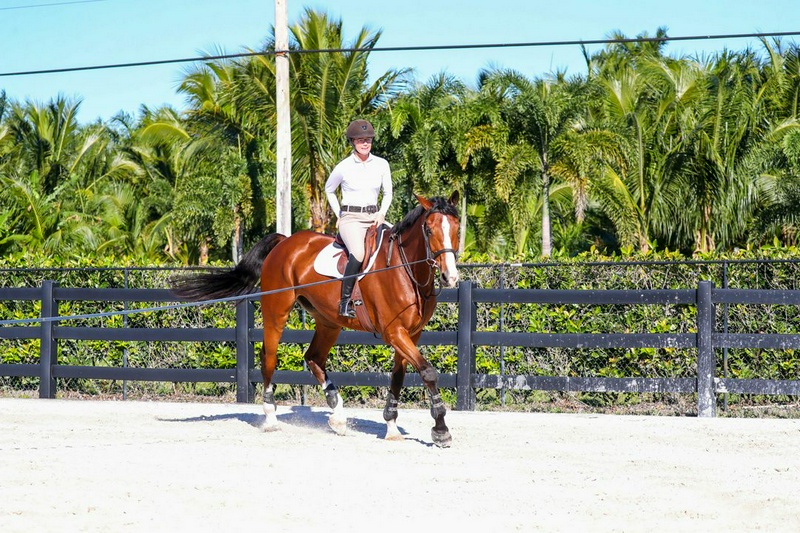
One of the most important things you can do to improve your riding is to eliminate stiffness and tension in the body.
This problem is at the root of many riders’ issues.
For example, if your back is hollow and stiff, you may sit in the saddle, but you won’t “get in” it; your body will not smoothly follow the horse’s movement.
Worse still, the hollow in your lower back pushes your seat bones into the horse’s back, causing him to raise his head, hollow his back, and stop the forward thrust from the hind legs.
Likewise, stiff hands and arms cannot move smoothly with the horse’s mouth or apply the necessary aids effectively.
If your elbows are locked, every time you rise in an uphill movement, you will unconsciously pull on the reins.
If your horse uses a bit without joints, he will feel these tugs on his tongue and the corners of his mouth.
If he has a jointed bit, he will feel these tugs in those same areas, plus two other much more sensitive points: the roof of the mouth and the bars (the spaces between the teeth).
Depending on how sensitive the horse is, this discomfort can make him nervous, reluctant to move forward, or heavy and unresponsive in the rein.
Body stiffness in the rider is often the result of an incorrect attempt to avoid bouncing and jolting.
Trying to sit motionless in the saddle makes you tense your body and hold your breath, and that only makes you bounce more.
That is why hearing instructors tell their students to “sit still” drives me crazy!
To move correctly with the horse, you must allow your body to move.
The only time you should be motionless is when you are at a complete halt.
Over fences, any stiffness in the hands, back, or legs makes negotiating a technical line almost impossible.
This can interfere with the horse’s movement and cause discomfort in his mouth and/or back.
As a result, he will either refuse to respond to the leg aids or become insensitive to the rein aids and rush over the fences.
This affects all phases of his jump, from takeoff to the middle of the jump and landing.
For example, if you sit close to his neck in a forward-leaning position—ahead of the motion’s rhythm—and keep your body completely still on the approach to the fences, your horse may stop, add a stride, or ignore you and quicken his pace.
He may also hollow his back and jump in a form that is undesirable in hunter classes and increases the likelihood of a knockdown with the front legs in jumper classes.
Meanwhile, the force of his jump may throw your weight back in the saddle and cause him to drop his hind legs, potentially knocking down a rail as well.
Fortunately, there are a few very simple ways to deal with stiffness.
Use the following four exercises to become more relaxed and ride better!
Exercise 1: Breathe Away the Stiffness One of the most effective tools for reducing body stiffness is breathing.
Breathing relaxes your muscles and helps you establish better communication with your horse through subtle aids.
By contrast, holding your breath prevents your body from getting proper oxygen; it starts with the extremities, namely the hands and feet.
Holding your breath also deprives the brain of oxygen, and the result is that either you cannot think clearly, or your mind races in so many different directions that you practically cannot do anything it tells you to do.
So, to keep your mind clear, breathe.
The best way to control breathing is to talk.
Physiologically, it is impossible to speak without breathing.
Do the following exercise while working in the arena, with or without stirrups: in a large circle, ride sitting trot.
In a loud, clear voice, count from zero to 100 in fives, in time with your horse’s steps: “5, 10, 15, …
”.
When you reach 100, count back down from 100 to zero in fives again: “100, 95, 90, …
”.
Then count to 100 and back in twos.
If you want to continue, do the same in threes.
This exercise makes you focus on counting and breathing instead of trying to sit in sitting trot.
You will notice that your whole body starts to relax and sinks more “into” the horse and moves more in harmony with his motion.
If your voice becomes really shrill and thin, it means you have held your breath.
You will also get very tired!
Ask a friend to stand nearby and, if they hear this happening, tell you: “I can’t hear you—better start breathing!”
You can do this exercise on the longe line as well.
If your sitting trot is not yet fully established, tie the reins and place them on the horse’s neck.
Then, with your outside hand, hold the pommel of the saddle.
Take your inside hand back and hold the cantle.
Try this exercise in canter as well and match the counting to your horse’s canter strides.
Do this regularly in both gaits, during practice sessions or lessons, for at least a month.
Then return to it whenever you feel your body starting to tense up.
Once you find this connection between breathing and relaxation, look for other ways to incorporate it into your riding.
For example, if you are having trouble at home learning a skill or specific exercise, set it aside for a moment and do sitting trot on a circle.
At the 12, 3, 6, and 9 o’clock positions, take a few deep, relaxed breaths.
This will briefly take your mind away from the thing you are working on and help your body relax; then you can return to it much better prepared.
Do the same in a flat class at a horse show; choose four points around the arena (for example, the middle of each side of the arena) and take deep breaths there.
In course walks for jumping classes, also choose four points on the course at which to take deep breaths.
You will be amazed at the difference this makes.
Exercise 2: Softening stiff, rigid hands Many riders stiffen their arms to keep their hands still.
The result is unintended, accidental pulling on the bit.
In order to be able to correctly and softly follow your horse’s mouth, you must allow your elbows to move.
Do this exercise: pick up a sitting trot and place your hands on either side of the horse’s withers, or a few inches farther forward on his neck.
You may need to bring your shoulders farther forward than usual to do this.
Keep a straight line from the back of your wrists, and do not rotate your wrists or bend your hands inward or outward.
1.
In sitting trot, Ella brings her shoulders far enough forward that she can place her hands on Raffi’s neck.
Notice the straight line from elbow to mouth.
Each time she sits in the saddle, her elbows naturally close.
©Susan J.
Stickle 2.
When she rises from the saddle and keeps her hands on Raffi’s neck, the angle of her elbows naturally opens.
©Susan J.
Stickle As you move in trot, let your elbows do all the work needed to keep your hands on your horse’s neck.
Notice how the elbows open when you rise from the saddle and close again when you sit.
Continue this exercise until that feeling becomes completely comfortable and natural for you.
Then remove your hands from his neck and, while maintaining the same elastic movement in your elbows, return your shoulders to their normal position.
This is the first step toward developing independent hands.
Exercise 3: Endless Reins for soft hands This is another great exercise for releasing the arms and hands while also teaching you to rely more on your legs than on the reins to turn the horse.
Do this exercise only on a calm horse, preferably one that responds to voice commands (such as “walk” and “whoa,” which you or your trainer can use if he does not react to your other aids).
Always do this exercise in a safe, enclosed arena with the entrance gate closed.
Go to a hardware store and find laundry cotton cord that is slightly thicker than ordinary dryer cord.
Buy enough to equal the length of your reins, plus another 8 to 10 inches for tying.
Make sure there is no wax or coating on the cord that would make it slippery.
Thread the laundry cord through one ring of your horse’s bit, then pass it under his chin and out through the other ring.
Bring the two ends of the cord around his neck and tie them together to form a continuous loop.
Tie up your regular reins and put them on your horse’s neck.
Then take up the laundry-cord “reins” and walk your horse around the arena.
1.
Ask a trainer or a friend to thread a clothesline rope through one of the bit rings on your horse, then pass it under his chin and through the other ring.
©Susan J.
Stickle 2.
Bring the two ends of the rope around his neck and tie them to form a continuous loop.
Tie up your real reins and put them on your horse’s neck.
Then take up the clothesline “reins” and walk your horse.
©Susan J.
Stickle Very soon you will realize that steering with this loop of reins is much more difficult than with ordinary reins, because it slips on the bit.
If you only take the inside rein to turn, the loop will pull your other hand forward as well.
The tighter your hands are, the more difficult this becomes.
The only way to communicate effectively with your horse is to soften the joints of your hands and turn with both hands at the same time.
To turn your horse or ride a circle, use a slight opening of the inside rein: move the inside hand 2 to 3 inches in the direction you want to turn.
At the same time, use an indirect outside rein: move the outside hand toward the withers so the rein comes closer to that side of the neck or even presses against it.
Most importantly, do not let your outside hand move forward and toward your horse’s mouth.
Meanwhile, place the inside leg next to the girth against your horse’s side; it should act like a hinge and bend his body around it.
Place the outside leg a few inches behind the girth to guide his body in the direction you want.
3.
If you try to turn your horse by pulling on the inside reins and allow your outside hand to slide forward, the rein will simply pass through the bit rings.
©Susan J.
Stickle 4.
Here, Ella shows how to turn correctly: by using both legs and both hands at the same time, without the outside hand moving forward.
Raffi’s soft jaw and expression show that his hands and arms have maintained a gentle, elastic connection to his mouth.
©Susan J.
Stickle Note that you should keep the looped rein knot on one side of your horse’s neck, not under the chin, on the bit (which would be cheating, because it would work on him like ordinary reins), neither in your hand nor between your two hands.
If you encounter any situation that might be dangerous — for example, when you get too close to another horse — temporarily take up the ordinary reins to move away from the danger, then place the knot back on the crest of the mane and continue riding with the loop reins.
This takes a lot of practice, but it is a very valuable skill to learn.
(It can also be very entertaining for spectators, because riders often get stuck in one corner before they understand how to use their aids correctly.
) This skill will help you have more control in all your riding—without tension.
Also, the more you ride with your legs and not with your hands, the more likely your horse is to respond by becoming lighter in the bit and more responsive to subtle aids.
5.
With this relationship built on trust and clear communication (guided mainly through the legs), Ella feels secure enough to jump over a fence with “endless reins”—so confident that here she has allowed herself to have a loop in her connection.
©Susan J.
Stickle Once you have mastered this exercise, try it at the trot and canter as well.
More experienced riders can even detach the ordinary reins completely from the bit—and, if they are comfortable, ride over small fences with loop reins as well.
A good test is to jump over a cavalletti on a circle.
Exercise 4: Three positions for jumping Trying to maintain a perfect position on course is another common reason riders become stiff.
Instead of “posing” in the saddle, you should continually move between different positions so that you can support your horse when needed.
In general, the more you bring your shoulders back and press more weight into the saddle seat, the stronger your hand and leg aids become.
In every course or jumping exercise, there are three basic positions that you should be able to move into and out of easily: Light two-point position —similar to the regular two-point position, in which your balance is on your feet (your two “points”), except that in this case, instead of lifting your seat completely out of the saddle, you gently place some of your weight on the pubic bone and the front of the seat bones, while your groin remains behind the front of the saddle and the angle of the pelvis remains closed.
Light three-point position —by opening the angle of the pelvis slightly, your shoulders come a little farther back—but not so far that you fall behind the movement of the horse—and your weight settles a little deeper in the saddle and is distributed more evenly over the pubic bone and the seat bones.
Full three-point position —by opening the angle of the pelvis further, your shoulders line up over your pelvis and heels, and your weight is balanced over the seat bones.
Sometimes you may also need to resort to a full three-point position behind the motion: that is, bring your shoulders behind your pelvis to drive the horse forward; for example, if he hesitates in front of an obstacle, or to create more leverage with your reins if he wants to pull you along.
But the three positions above are the most common ones riders need on course.
Light two-point position: between obstacles, Ella maintains contact between the front of the seat bones and the saddle while keeping her pelvic angle slightly closed so she can stay with her horse’s movement.
©Susan J.
Stickle When you begin canter at the start of a course, you should usually be in light two-point position so that your horse can move freely underneath you without any extra pressure.
In the last few strides before the first jump, move into light three-point and have a little more control over speed and rhythm.
This not only puts you in the best position for your horse’s takeoff power to carry you into the jumping position without you falling behind the motion, but it also shows him where you are.
Horses like to know at that critical moment where their rider’s weight is so they do not worry about losing balance.
Because this position is not as deep as a full three-point, your horse can still step underneath himself at takeoff without your weight restricting him.
Whenever you need more control, move into full three-point.
For example, in a jumper class where you approach an obstacle after a very short turn, using full three-point in the turn helps reinforce your leg and rein aids to keep your horse on the line you have chosen without losing impulsion.
Light three-point position: as she approaches any jump, Ella places more weight on the saddle while still keeping her pelvic angle slightly closed and her shoulders ahead of her pelvis.
©Susan J.
Stickle Practice moving into and out of these positions in flat work at canter.
Bring your body up into light two-point position and hold it for a few strides.
Then slowly sink into light three-point and then full three-point.
From full three-point, gradually return again to light three-point and light two-point.
Repeat this exercise until you can feel the clear difference among all three positions.
Sometimes also try a normal two-point — by fully lifting your weight out of the saddle — and experience a full three-point behind the motion as well — by bringing your shoulders back and behind the hips — so that you can feel those differences too.
When you can carry out all of these positions smoothly and without interruption one after another, try this exercise over fences as well.
(More experienced riders can do this without stirrups.
) On long approaches and when turning, start with light two-point, then go into light three-point in the final few strides before each jump.
In any sharp turn, or any time your horse needs a little extra encouragement to jump, use full three-point.
To make sure you have not stiffened up, say out loud what you are doing; for example: “Now I am in light two-point.”
When you talk, you breathe, and if you have been focusing on your body position, you will not have a chance to tense up.
ABOUT KIP ROSENTHAL The late Kip Rosenthal.
©Susan J.
Stickle The late Kip Rosenthal, who died on 20 August 2020, was regarded as one of the country’s top hunter/jumper/equitation trainers, and had himself earned many national titles before guiding several juniors to similar success.
Kip, who was an “R” judge with the United States Equestrian Federation, judged numerous medal, hunter, and pony finals across the country.
In addition to running his own business, Benchmark Farm, in Wellington, Florida, he was an active sports psychologist with a doctorate in psychology.
This article was first published in the Fall 2020 issue of Practical Horseman magazine.
Source: Practical Horseman – Training