A basic grade for all seasons
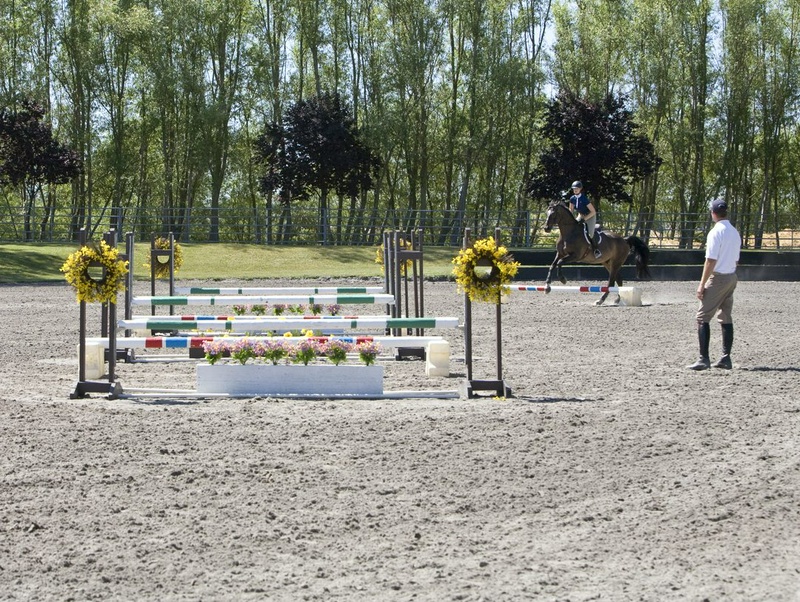
We work with hunter, jumper, and equitation horses and riders at all levels.
Arranging, adjusting, moving, and setting up obstacles and courses in a way that meets everyone’s needs can be difficult.
One of our solutions is to work on a small but versatile grid made up of curved lines, straight lines, and set distances.
This basic grid — a single cavalletti, then a curved four, then a vertical-oxer-vertical combination, and then another curved four over a cavalletti — teaches a range of jumping skills.
For the rider, this exercise helps focus on improving position and developing or refining aids, because the grid removes much of the decision-making involved in single fences and courses, including finding the right distance.
Once you have found your distance to the first cavalletti, you can focus on balance, stride length, and track.
Your horse also benefits from this exercise in several ways: his jumping style improves, because the distances within the grid help him adjust his landing and takeoff to an equal distance in front of and behind each obstacle and keep the arc of his jump centered exactly over the middle of the obstacle.
When you focus on yourself, you interfere less with his balance, and that allows him to jump in better form.
By going through the grid in both directions, he uses both sides of his body equally; this helps strengthen the hindquarters and develop his balance.
He also bends equally to both sides and maximizes flexibility throughout his body.
When he jumps the grid repeatedly, without allowing him to drift inside the track or fall out on the track, any possible tension in him disappears.
This helps him go through the grid with a relaxed neck and supple shoulder, and sharpens and refines his front end.
By focusing on reaching the center of each element and jumping from its middle, you teach your horse to stay straight; this helps strengthen him because he must take off equally from both hind legs and ultimately produces a more beautiful jump.
After you have developed or refined these skills on the basic grid, you can modify the grid to work on more difficult tracks, distances, and heights.
Even if you do not have access to a large, all-purpose facility, this grid is a useful training tool.
A calm, balanced, and flexible horse performs better as a hunter, jumper, or in equitation.
In this article, we explain the grid in its most basic form and review the exercise step by step.
Please note that less experienced horses and riders may work on the basic grid for several sessions — even intermittently over the course of an entire season — to learn how to perform these fundamental skills well.
At our stable, horses and riders practice on the grid during the season whenever they need to review specific skills.
The Basic Grid You need: دو cavalletti، دو vertical، یک square oxer.
Preparation: According to the diagram above, place a narrow square oxer in the center of your training area and set the verticals 22 feet in front of and behind it.
Place a cavalletti 54 feet from each vertical as well, on curved, symmetrical, mirror-image lines relative to each other.
Begin the exercise with the verticals and the oxer set between 2 feet 3 inches and 2 feet 6 inches, and raise the cavalletti off the ground as well (traditional cavalletti with Xs at both ends are also suitable, although we prefer commercial Bloks, on which we place the rails at heights of 12 or 18 inches).
Depending on your skill and your horse’s level, you can lower the jumps or even use ground rails.
Exercise: You ride this grid in both directions and at the canter; the bending line to the first vertical is four slightly collected strides, then one stride to the oxer, one stride to the second vertical, and again four bending, slightly collected strides to the second cavalletti.
Benefits for your horse: In addition to the benefits explained above, the bending lines help him land comfortably on either lead.
He also learns to keep his topline relaxed, stay straight and even in front of the legs, maintain equal bend from poll to tail before and after the jump, and keep the corners of his mouth soft and flexible.
These are desirable qualities in all jumping horses.
Benefits for you: You will strengthen and stabilize your position, with your weight in your heels, and you will focus on maintaining balance in the middle of your horse.
Your trainer or an informed friend can watch you from behind as you go through the grid to make sure that you are not twisting or leaning to either side.
A good center of balance is essential for a good jump, and any bending of the body in this exercise becomes clearly visible.
You will also learn to follow the line with your eyes and shoulders and keep your horse’s pace steady from start to finish.
Even if you are an advanced rider, you can strengthen and stabilize your position by riding this grid without stirrups.
How to do it: Take a left lead canter and enter the jump through the middle of the raised cavalletti.
Just as you leave the ground, turn your eyes and shoulders to the left and toward the “in” vertical, and slightly release the left rein to softly indicate the direction you want your horse to turn.
Keep your weight in your heels and add a little outside right leg to encourage him to follow the 54-foot bending line in four slightly collected strides to the middle of the first vertical.
As the horse leaves the ground, keep your legs down and close to his body and maintain a straight, long upper body.
Do not lean down or let your body get ahead of him.
Look straight ahead and ride the 22-foot one-stride distance, jump the oxer, and travel the 22-foot one-stride distance to the second vertical.
As you leave the ground over the second vertical and prepare for the slightly more collected four-stride curved line to the raised cavalletti, do exactly what you did on the approach line: release the left rein, put your weight in your heels, and give a little with the right leg.
If you are relatively new to jumping, focus on developing only one or two qualities at each stage.
Once they are established well enough, move on to the next skill so that the whole line feels smooth and confident.
1.
Maximilian, a seven-year-old Hanoverian owned by Emma Waldfogel, canters in a left lead over the middle section of the raised cavalletti.
As he leaves the ground, I turn my gaze and shoulders to the left, toward the “in” vertical in the grid, and slightly release the left rein to indicate the direction I want him to turn.
© Carol Farrow and Sarah Draxton 2.
By keeping my weight deep in my heels, I continue to keep a little inside leg on Maximilian to encourage him to follow the curving 54-foot line in four slightly collected strides to the vertical in the middle of the combination.
© Carol Farrow and Sarah Draxton 3.
As Maximilian takes off over the small vertical, I keep my legs down and around his body and maintain a straight upper body.
I look straight ahead and ride the 22-foot one-stride distance.
© Carol Farrow and Sarah Draxton 4.
I maintain a strong body position over the oxer: my weight is in my heels and I am balanced and centered on Maximilian so he can focus on his balance and jumping style.
Looking straight ahead, I give a short release and maintain a soft contact with his mouth.
© Carol Farrow and Sarah Draxton 5.
As Maximilian canters the one-stride distance between the oxer and the second vertical in half-seat, I maintain a soft contact with his mouth and keep him in the middle of the line so he learns to stay straight.
This encourages him to take off evenly with both hind legs and produce a beautiful jump.
© Carol Farrow and Sarah Draxton ۶.
As Maximilian jumps the second vertical, I move my eyes and shoulders to the left and, by opening the left rein slightly, give the message that we are going to turn in that direction.
As soon as he lands, I add a little inside leg to encourage him to follow the curving 54-foot line in four slightly more collected strides to his last raised cavalletti.
© Carol Farrow and Sarah Draxton Troubleshooting tips: What should you do if your horse cuts in and reaches the vertical too easily, or drifts out and comes to the obstacle too far away?
The landing stride of the cavalletti is usually where he will start, so if he cuts in, place a guide rail about 2 feet inside the curve, or if he drifts out, place it outside the line.
Remember to angle the rail so it follows the curved line too.
Guide rails should be set so that the horse is aware of them but cannot step on them.
What should you do if your horse gets nervous and quick, starts to rush his arc, and comes too much onto the line to get to the next jump sooner?
These distances are set to keep his arc centered over each jump, so calm him by taking more time and using half-halts and repetitions at the lowest height.
On the first stride after landing, and as soon as your horse has had the chance to put all four hooves on the ground, gently and steadily add the rein and apply a little more pressure on his mouth to encourage him to regain his balance, step under himself, and take a lighter, shorter stride.
If you stay calm and do this consistently, he will eventually learn to settle and travel the jumping line in the right rhythm.
Once you can ride this basic grid in both directions, over and over again, with a calm horse and a smooth, effortless jump, and feel your body position stay softly with him — neither falling ahead of his movement nor lagging behind — it is time to move on to more difficult exercises.
About Ned and Hope Glynn Ned and Hope Glynn previously owned and managed Sonoma Valley Stables in Petaluma, California.
Over the years, they have trained hundreds of local, regional, and national champions and reserve champions in the hunter, equitation, and jumper divisions.
Their riders have won multiple local and regional medal finals.
Their students also compete in divisions from Short Stirrup to national grands prix.
In 2012, Ned was the head coach of an award-winning team at the Spruce Meadows Skyliner Tournament and was also the trainer of the best horse in Section 1.
3 meters.
Hope, with Chances of Flurries, won the reserve championships in the High Performance Working Hunters at HITS Thermal in 2011 and 2012.
She also won the U.
S.
Equestrian Federation national championship in the Performance Hunters division with Woodstock in 2011.
In addition, Hope placed in the top 25 at the 2011 $100,000 U.
S.
Hunter Jumper Association International Hunter Derby Finals and the Diamond Mills $500,000 Hunter Prix Finals.
She recently received the Arthur Hawkins Award of Excellence for her contribution to the show hunters industry.
Also in 2012, Ned and Hope were inducted into the Sonoma Horse Council Hall of Fame for their contribution to the horse industry in their region.
Hope and Ned have been members of the hunter and jumper committees, respectively, in USHJA Zone 10, and Hope has also been a member of the USHJA Derby Task Force.
They have a daughter named Avery, who competes at the collegiate level.
Source: Practical Horseman – Training