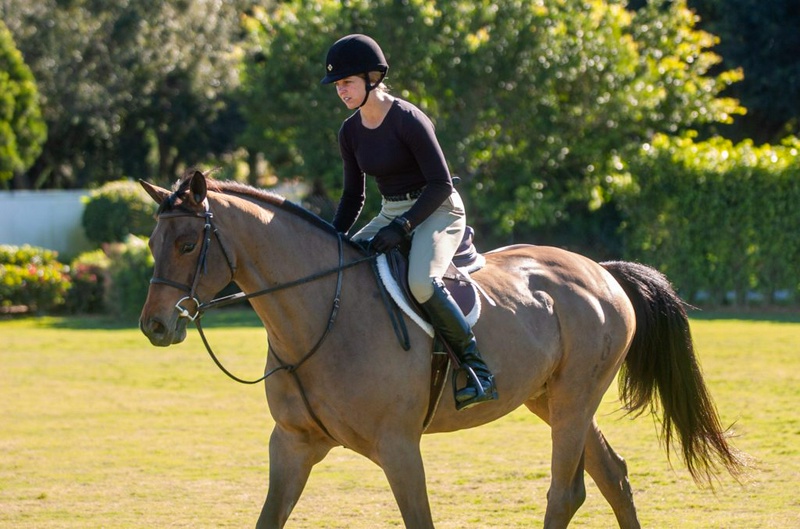
(For example, suppose the horse is cantering on the right lead and its right fore and hind legs are apparently “leading.”
At the moment of suspension, it changes the order of its strides so that this time the left fore and hind legs become the leaders.
) In natural conditions, the horse’s head remains at a steady level, and its back and neck are soft and relaxed.
Its hips and shoulders also remain perfectly aligned throughout the process.
Flying changes under saddle should show these same desirable qualities.
But when you are just learning, it is hard to know how much of this work is up to your horse and how much is up to you.
The best way to learn is to practice on a horse that already knows automatic changes so that neither of you is learning a new skill at the same time.
Just like an automatic car, a horse that changes lead automatically seems to “shift gears” on its own.
But just as in a car, it still needs a certain amount of input from the “driver.”
The key to performing smooth lead changes is to give your horse just enough input to notice the lead change without disturbing its relaxation, balance, straightness, and rhythm.
Unfortunately, some riders try too hard to create the changes; they bounce heavily in the saddle, pull on the reins, throw the horse off balance, and make it anxious and tense.
As a result, horses lose their rhythm, change late behind (that is, change their hind legs several strides after the change in the front legs), or miss the change altogether.
My emphasis in this article on calmness and softness is primarily aimed at hunter and equitation riders.
But the skills I explain here will also be useful to riders in other disciplines.
If you rely on straightness, balance, and a clear understanding of your canter aids, you can prepare your horse to execute flawless flying changes every time.
Step 1: Perfect your canter departure Giving the cue for a flying change is much less mysterious than it seems.
You simply ask for a canter lead while you are cantering on the other lead.
To complete your aids in this area, practice canter departure; first start from trot (which is easier, because your horse has more impulsion to carry into the transition), then from walk, and ask for the soft response to your aids the very first time you ask.
Your job is to make sure it is sensitive, attentive, and responsive to your aids, while remaining calm and content.
Here is how to do it: 2.
As you approach the obstacle, make sure your shoulders are straight and your body is centered in the saddle.
Keep your gaze straight ahead and, at the same time as you close your inside leg and bring your inside rein slightly away from the neck and back, near the hip, ask the horse to bend slightly to the inside so that its body curves around your inside leg.
Meanwhile, maintain contact with the outside rein so the horse moves straight on the line you have chosen.
©Amy K.
Dragoo 3.
In the next step or two steps, move the outside leg slightly back, turn the toe one or two inches outward, and, keeping the leg long, press the heel against the horse’s side.
At the same time, close the angle of your pelvis slightly so you stay with the horse’s movement as he comes up into canter.
©Amy K.
Dragoo If your horse does not pick up canter immediately, release the pressure of your aids and then ask again, this time applying the outside leg aid more strongly.
Do not try to hold the initial aids until the horse picks up canter.
That will only make him crooked and unbalanced, and as a result create more tension and anxiety.
Or, if the horse responds slowly to the aids, you may make him completely unresponsive.
If he does not respond to stronger leg aids, release the aids and then reinforce the next aids by using the whip behind your outside leg.
When he finally picks up canter, reward him by softening the aids and allowing him to move forward in a steady rhythm.
Repeat the movement several times to make sure he responds to your aids in time.
Each time your horse picks up canter, remind yourself to stay straight and centered in the saddle.
Many riders develop the bad habit of looking down to check the lead leg.
This causes the shoulders to tip, which in turn also throws the horse off balance.
Instead, try to feel what the horse is doing beneath you without looking down.
Ask someone on the ground to confirm the lead leg until you can do this confidently yourself.
Practice the canter departures in both directions and try to time them so precisely that you pick up canter exactly on your chosen marker.
When these parts go well, repeat the same exercise from walk.
Step 2: Simple changes When you can make the canter departures accurately and on time in both directions and are balanced enough in canter to use the hand and leg aids independently of one another, you are ready to begin simple changes.
In this exercise, you begin with one canter lead, then shift to walk or trot for a few strides, and then ask for the other canter lead.
First find the best point in the arena for performing the teardrop loop shown in the diagram above.
To do this, you need enough space to make a short rollback turn off the rail and then return in a straight line with a very gentle angle, so that the return to the rail is not too abrupt.
Be sure to keep this area free of jumps, as they may distract your horse or teach him to anticipate changing leads when approaching obstacles.
Place a visual marker, such as a chalk mark and the like, on the rail so that you can focus on it as you move straight out of the rollback turn and back to the rail.
Also choose points on this line for making the transitions.
Initially, the transition from canter to trot should be made two or three strides before returning to the rail.
This ensures that your horse is completely straight in each transition.
For greater precision, mark these points with cones or jump standards.
Next, read the instructions for how to execute the exercise: 1.
Take a steady, relaxed canter and ride in what I call a “connected two-point”: sit lightly enough in the saddle that you can help the horse maintain his rhythm, but still allow him to use his back.
(In my opinion, sitting deeper and “driving” makes many horses become too quick and hard in the mouth, and that takes away your chance of smoothly executing flying changes.
) When you feel the horse relax and listen to your aids, pass your visual marker along the long side and stay 5 to 10 feet off the rail.
Then make a short rollback turn and cross the centerline of the arena or near it, while bringing in the inside leg and bringing the inside hand slightly back toward your hip to ask for bend.
To keep the horse from falling onto the inside shoulder, imagine pushing him with the inside leg toward the outside rein connection.
©Amy K.
Dragoo 2.
I make a short rollback turn, bring in my right inside leg, and bring my inside hand slightly toward my hip to ask for bend.
As soon as the rollback is complete, soften the bend aids and keep your eyes focused on the visual marker.
Keep your shoulders and hips square and straight, and maintain the outside rein connection so the horse’s body straightens smoothly; this will help you execute the simple change.
©Amy K.
Dragoo 3.
As soon as you pass the first transition marker, gently bring him back to the trot with both reins and be careful not to use so much hand that he throws his head up and gets anxious.
As soon as he starts the trot, soften your hands and, while maintaining a light connection, allow him to stay in a forward, soft rhythm.
Throughout all of this, keep your eyes focused on the visual marker.
©Amy K.
Dragoo 4.
After a few trot steps, change the bend by using the new inside leg, and direct the horse toward your new outside rein.
While still focusing on the visual marker, move the inside rein slightly away from his neck and back toward your hip to ask for a slight inside bend.
To keep the shoulders aligned with the hips and maintain a straight line toward the visual marker, use the outside rein and outside leg.
In the next step or two, move the outside leg a few inches back and ask for canter — while still focusing on the visual marker.
Here, I change the bend to the left by adding my new left inside leg, and I bring Lovey toward my new outside rein, the right one.
I bring my left hand toward my hip to ask for a slight bend and use the rein and outside leg to keep him straight.
Most importantly, he stays relaxed throughout his body.
©Amy K.
Dragoo 5.
When I pass the second transition marker, I maintain the new inside bend and move my new outside leg — the right one — back, turn my right toe slightly outward, and signal for left lead canter.
I have allowed my reins to become a little long and the straight line from his mouth to my elbow to disappear; the line that provides the most effective connection.
I continue straight for a few more steps and keep my focus on my visual marker.
©Amy K.
Dragoo 6.
To bring Lovey back to the rail, when passing my visual marker I use my inside leg — left — and drive him toward my outside rein.
Then I use the connection of my outside rein to straighten him back onto the rail.
He responds by softening and lowering his head and neck.
©Amy K.
Dragoo If your horse did not pick up the new canter — or if he took the wrong lead — bring him back to trot.
Straighten him and ask for the new lead again, using slightly stronger aids to begin the canter.
If he does not canter before reaching the rail, return to walk or trot and review the canter departures until your horse responds quickly to your aids again.
The straight sections of this exercise are very important, because they ensure the horse’s shoulders and hips are aligned for the transitions and keep you from pulling the inside rein to turn.
As you progress toward flying changes, these sections also prevent the very bad habit of overpulling the new inside rein to force the change; a habit that usually ends up throwing the horse off balance and causes the change to be lost or late.
Step 3: Progressing toward flying changes Once you can perform simple changes in both directions comfortably and correctly, gradually reduce the number of trot steps between the two canters; do this by delaying the transition to trot.
Work this process forward gradually over several training sessions so your horse stays relaxed throughout the exercise.
When the number of trot steps is down to a few — and your horse is still relaxed — it is time to prepare for the flying change.
Plan the rollback turn just as carefully as the simple change and choose a point for the change that is a few steps after the start of the turn and a few steps before returning to the fence line.
This keeps your horse straight through the change and prevents you from being tempted to pull him out of balance with the inside rein.
It also gives you enough room to ask again if he does not respond the first time.
1.
As with the simple change, before entering the rollback make sure your horse is calm and responsive with a forward, rhythmic canter.
In the connected two-point, lightly touch the saddle and again use your inside aids to bend him around the turn and drive him to the outside rein.
After the canter on the long side, I began the rollback turn with a forward, rhythmic canter.
In my connected two-point I lightly touched the saddle and used my inside (right) aids to bend Lovey around the turn and drove him to the outside (left) rein.
©Amy K.
Dragoo 2.
After the turn, straighten him and keep the calm, rhythmic canter for a few strides.
Once you are sure his shoulders and hips are perfectly straight, ask for the new bend by closing your new inside leg and connecting to the new outside rein; at the same time, bring the new inside rein slightly back toward your hip and away from your horse’s neck.
Immediately afterward, bring the new outside leg slightly back, turn the toe one to two inches outward, and press the heel to his side to ask for the new canter lead.
Think about moving forward and apply your aids in the canter rhythm; do not act hastily to change the lead, and do not force it with too much pressure.
©Amy k Dragoo 3.
When the horse comes up for a flying change, tuck your pelvis slightly so that his back has enough freedom to arch.
Keep your shoulders straight and your body centered in the saddle, and keep your eyes on your visual marker.
This helps him stay balanced and straight so he can make a clean change.
Immediately after changing bend, I signal for the new lead: I take my new outside leg, on the right, slightly back, turn the toe of my new outside leg out one or two inches, and press my heel against Lovey’s side, while keeping my inside leg on the left there to maintain straightness.
©Amy K.
Dragoo 4.
After the change, continue straight toward my visual marker for a few more strides.
Then, with a soft inside-leg aid and outside rein, gently bring the horse back onto the track beside the wall.
Again, Lovey’s head and neck position shows that he is calm and happy.
©Amy K.
Dragoo Until you get the feel of a flying change, it can be difficult to tell exactly when it happened and whether it was complete.
Someone on the ground can confirm that the changes were done correctly.
If you made a good flying change, quietly return to walk, pat your horse and even yourself, and repeat the exercise in the other direction.
At this stage, the fewer repetitions, the better for your horse.
Overdoing flying changes can make horses nervous and tense; that leads to many problems.
If your horse does not make the flying change immediately and you still have a few straight strides before reaching the track beside the wall, release the aids, check the new bend, and ask for the change again with a stronger leg aid.
If the change still does not happen — or if you run out of room before turning toward the wall — go back to trot and ask for a simple change.
This makes it clear to your horse that you wanted the correct lead, without making him anxious with extra pressure and leg.
After he gives the correct lead, quietly return to walk and repeat the exercise from the beginning.
The next time you practice the flying change, start from ordinary canter departs and gradually move on to simple changes, while reducing the number of trot strides until you reach the flying change again.
This process may seem boring, but it is essential for keeping your horse calm while also establishing balance, body position, and aids.
Do not be tempted to skip any step until you are confident in your own skill and sure that your horse is soft and relaxed.
Once you are sure that you can make correct, solid changes on the ground, you are ready to do them after jumps as well.
Use the same techniques, including your visual markers for keeping straight.
Remember: at every stage of this process, you may need to be firm and clear at times so that your horse remains responsive to your aids.
But never be harsh!
Your horse cannot produce soft, silent flying changes until he is completely relaxed and confident that he can trust you.
With patience, however, you can help him perform successful, smooth flying changes.
Troubleshooting 5 problems in Flying Lead Change Problem 1: You can’t execute a Flying Change.
Correction: If your horse has previously been reliable in automatic changes, ask the veterinarian to assess and rule out any possibility of physical discomfort that may be preventing him from trying.
Also ask the person on the ground with you to look carefully and see whether you are unintentionally preventing him by shifting your weight or by having too strong a contact with the reins.
If, after doing all the steps above, your horse still does not execute the Flying Change in two or three attempts, get out of this exercise and do something else until he becomes mentally calm.
Then go back to the initial steps, namely completing normal Canter Departures and the Simple Change.
Building these skills on a base can eventually lead to easy Flying Changes.
Also, do not do this exercise at the end of a session, when the horse’s fatigue may make it harder to perform.
Problem 2: Flying Changes are easier on one side than the other.
Correction: Practice Flying Changes on your stronger side and pay close attention to everything you are doing correctly regarding your body position and aids.
How much pressure do you have in each hand?
Where is your weight balanced?
Then try to transfer those same correct skills to the more difficult Lead.
Also work on normal Canter Departures and the Simple Change on the more difficult side so that his response to your aids is strengthened.
Again, if there is no obvious reason for the problem, consult the veterinarian.
Problem 3: Your horse raises his head and speeds up in the Flying Change.
Correction: This is the most difficult problem, because correcting it takes the most time and patience.
Never lose your temper when dealing with this problem, because it will only set you back a few steps.
Also do not correct him too slowly.
This will only make your horse more nervous, because he knows he needs more impulsion to execute the change — and he must create it himself by quickening.
Go back to the Simple Changes so your horse can relax again.
Then try to use less hand in preparing for the Flying Lead Change.
Establish a forward, relaxed rhythm and focus on following his mouth with your reins — while still maintaining soft contact with the mouth to ask him to stay in the same rhythm — and allow his back to stay relaxed (without “driving” with the seat!
), just as he makes the change.
Problem 4: Your horse changes late behind.
Correction: This problem usually occurs when your horse anticipates the turn ahead of time and drops his shoulder, so his shoulders and hindquarters are no longer aligned — or your horse is too slow to your new outside leg.
Make sure you are not making the change too close to the wall (mark a spot for yourself so you know exactly where you want to make the change) and remember to focus on straightness.
Keep your hips and shoulders square, keep your body balanced in the center of the saddle, and keep your gaze forward; and always be careful not to make the inside bend rein aid so strong that the horse leans on it.
You can also create a path for the straight portion of the teardrop exercise, between two rows of cones that are about 8 feet apart, to help you keep the horse’s body straight.
If your horse does not respond well to your outside leg aids, do a few starting counter canter strides to remind him that he should be more responsive.
Problem 5: Your horse changes leads before you ask.
Fix: This usually happens with horses that have been overworked on flying changes.
If you need to practice the changes for yourself, shorten the distance you ride along the long side before beginning the rollback.
This shortens the loop and gives your horse less time to anticipate the change.
Note: Different changes for different disciplines In hunter and equitation rings, flying changes should be smooth and clean (without a late change behind).
In dressage, flying changes have more suspension and lift in the horse’s body.
And in jumpers, unlike hunter and dressage, changes in the horse’s expression and other signs of tension are not penalized — but his quick response to your aids is of primary importance.
However, in all of these disciplines, balance, straightness, and relaxation are all essential.
About Jennifer Bauersachs Jennifer Bauersachs.
©Amy K.
Dragoo hunter trainer, Jennifer Bauersachs, on Mombo won the Leading Lady Rider title at the Devon Horse Show, on Sterling was Grand Champion at the Washington International Horse Show, and has also won championship and champion-of-champions titles at many other top indoor shows.
Her students have won major titles in the Amateur-Owner and Junior divisions at competitions such as the Pennsylvania National Horse Show, Washington International, and Devon.
Jennifer and her husband, Rolf, own Spring Hill Farm in Frenchtown, New Jersey.
This article first appeared in the June 2010 issue of Practical Horseman.
Source: Practical Horseman – Training