Why the rider's body position in the hunter ring is decisive
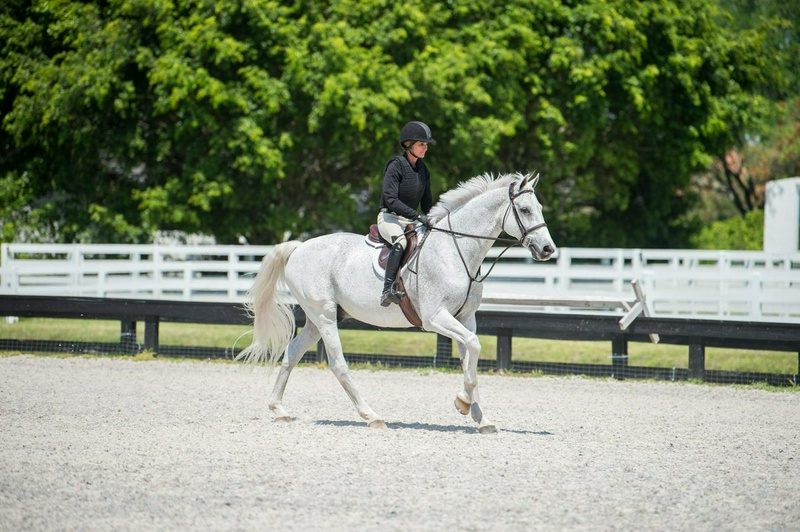
The topic of proper riding position is usually raised in training sessions; when I remind an amateur rider to keep their heels down or to maintain their upper body more calmly and steadily over the jump.
The rider stands and respectfully asks, "Judging is based on how my horse moves in the hunter ring, not on my riding position.
So why does my body position matter?"
This is a completely honest question.
But I believe that proper riding position is very important.
As hunter riders, we present an image of the horse as our dance partner; a fluid and delicate image that flows beautifully in the ring.
When our bodies make ugly or distracting movements, this visual ballet is disrupted.
Yes, it is the horse that is being judged, but the judge still sees the whole picture.
Another point is that the correct form is accompanied by proper function.
Classical style not only makes you a more aesthetically pleasing rider but also makes you a better rider.
If your gaze is upward and your shoulders are back, you create better balance with your horse.
Closing your fingers around the reins and maintaining the correct length — while your elbows are slightly ahead of your chest and a straight line forms from your elbow to your hand and the horse's mouth — helps you land in a regular and balanced manner after the jump and execute a good change of rein.
Drawing your legs down on both sides of the horse, along with transferring weight to the heels and positioning the toes correctly in line with the kneecap, provides the necessary support base to maintain your balance and effectively apply leg aids.
So why do we see so many successful professional riders whose form is not completely flawless?
Most of them have incredible talent, have gained years of experience, and are very precise when approaching jumps.
Moreover, many of them ride excellent horses; well-trained horses with beautiful jumping style.
In such cases, minor rider errors are less likely to distract the judge from the overall picture.
In contrast, talented horses with average appearance are not as impressive, so there is a greater chance that the judge will notice their rider's mistakes.
Therefore, classical style will always be the most effective way to ride and compete.
Watch professional riders who adhere to proper riding position closely; observe their bodies and the level of calmness and stability they exhibit.
Peter Wylde has the most beautiful form of hands and arms.
McLain Ward always rides with a powerful leg position, regardless of the height of the jump.
There are also a few young professionals like Cassandra Kahl and Lina Romand who ride with very beautiful style.
The success of these individuals at the highest level of our equestrian sport shows that proper riding position really works.
Proper riding position means being able to create good outcomes throughout the course, through your body form — not despite its flaws.
To cultivate classical style, you must understand through feeling and experience how the correct form helps both you and your horse every time you ride.
In upcoming exercises, I will present my solutions for common riding position problems.
Problem: Weak leg position We have all heard this phrase from our early riding days: "Heels down, toes up."
"There is no need for the heels to be glued to the ground, but when your weight flows down through a soft and deep heel, it creates a solid base for support.
The pressure of the foot's chest on the stirrup and the weight on the heel both create security and flexibility.
Some riders have another bad habit and rotate their toes outward to use the heel or spur.
In this case, they are effectively using the back of their calf for support.
This looks neither good nor effective, as the protrusion of the toes disrupts the straight line between the kneecap and the tip of the toe.
The result is that the continuous and ideal connection between the foot and the horse is weakened.
In the correct foot position, the inner part of the calf from the knee to the ankle should be in contact with the horse's side.
Solution: Practice the two-point position whenever you can, practicing riding in the two-point position at a trot.
This is the same position as the 'up' part in sitting-rising trot: the seat is lifted off the saddle, the weight is balanced on the lower part of the legs, and the hip joint is slightly closed.
This exercise helps you learn how to stabilize the foot position using weight, energy, and the core muscles of the body.
The back should be relaxed but straight, the gaze should be forward, and the seat should only be a few inches away from the saddle.
Think of releasing your weight slightly down through the heels while still feeling the pressure points on the chest of the legs.
Keep the toes pointing forward—but never rotate them inward, as this will separate the ankle from the horse—and keep the inner part of the calves in contact with the horse's sides.
Better yet, practice the two-point when a trainer or an experienced person working with horses guides you on a calm and reliable horse on the lunge, and you perform the exercises described in the photos on page 92 and beyond.
If possible, use a designated lunge area.
Or, using obstacles or bales of hay, fence off part of the arena and create a circle with a diameter of about 50 feet.
(Note that while the horse can be lunged on a larger circle for physical practice, it is better for the purpose of these exercises to be on a more controllable path.)
Also, tie the reins approximately in the middle of the horse's neck so that you can safely release them during the exercise.
Why this exercise is effective: When riding on the lunge line, you can confidently release the reins.
When you have no connection with the horse's mouth, the core muscles of the body must engage to keep you centered, and only the correct foot position allows you to maintain your balance during the exercises.
Without reins, all your sense and feel now come from the legs; this reminds you that you should always start riding from the legs and then reach to the hands.
1.
While walking on the lunge line, go into the two-point position.
To maintain balance, gently place your hands on the horse's neck.
2.
Release the knotted reins and extend your arms straight out to the sides while keeping your shoulders back and down.
Close your eyes and imagine your legs wrapping around the horse's torso, and all the weight flows from the head to the body, then through the legs to the heels.
Feel more pressure on the chest of the legs and the inner part of the legs.
© Amy K.
Drago 3.
Now sit down, place your hands on your thighs, and guide the horse into a calm sitting trot."
For most riders, maintaining a strong leg position in the sitting trot is more difficult; because we usually focus on sitting and forget what our legs are doing.
With one hand on the front of the saddle, gently coordinate your body with the rhythm of the horse's slow trot.
© Amy K.
Drago 4.
Then, without letting your heels slide up, bring the horse into a normal working trot and while your hands are on your hips or open to the sides, start to trot lightly.
When the horse's movement lifts you up, think about pressing down through your thigh and soft heels to absorb energy and keep your leg in the right place.
Pull your stomach in and engage your core muscles to keep your upper body steady.
© Amy K.
Drago Issue: Incorrect arm and hand position for riding correctly from leg to hand, we need to adjust the rein length and keep the hands in a position that creates a straight line from elbow to hand and then to the bit; at the same time, the fingers should remain wrapped around the reins and maintain a light and consistent connection with the horse's mouth.
However, this vital connection is often lost due to improper arm or hand position.
Below are three common issues: many people ride with open fingers and long reins, keeping their hands on their laps.
They think this position looks soft.
But this method is not effective; because the unstable messages that the horse receives from loose reins are confusing for it.
Also, when speed needs to be adjusted, this change becomes much more apparent, as the rider has less control over the continuum from leg to hand to the horse's mouth.
One common bad habit is riding with hands too low; a position that breaks the straight line from the horse's mouth to the elbows.
The misconception is that this helps the horse lower its head.
But when you lower your hands, you pull downwards.
In this case, the bit affects the bars of the horse's mouth, not the corners of the mouth.
The result is that the horse actually raises its head higher.
Many amateur riders ride with "stiff and inflexible" hands; meaning they stick their elbows to their sides to keep their upper body steady.
But flexible elbows make the hands more efficient and allow for finer control over the horse while still keeping the hands in the right position.
If your elbows seem to be glued to your ribs, you cannot ride properly.
Solution: Hold the crop with both hands. This exercise, by forcing you to hold a horizontal crop about 18 inches between both hands, creates the muscle memory needed to maintain the correct and steady position of the hands and upper body.
In this way, a "frame" is formed; a square between the crop, both hands, and your body, while still allowing enough space for the hands to move forward and backward, make necessary adjustments, and maintain a straight line from the horse's mouth to the elbows.
When performing this exercise, as explained in the photos on the opposite page, engage your core muscles so you can keep your chest open and carry your upper body without relying on the reins for balance.
Shorten the reins to maintain a steady contact with the horse's mouth and position the elbows slightly in front of the chest.
When performing transitions, turns, circles, and similar movements, try not to change the length of the reins or the position of your hands to communicate with the horse.
Instead, have the sense that your hands, arms, and body are one cohesive unit that continuously creates this flow of communication.
The connection from the leg to the hand should never be broken.
Make sure to keep your chest open while turning, and the horse remains centered under your body.
It's just like cycling: when you turn, your hands are on the handlebars on either side of the front wheel, controlling it.
On the horse, your hands are on the crop, directing the shoulders and front legs of the horse.
The reason this exercise is effective: I really like this exercise because it forces the rider to keep the length of the reins steady, maintain a closed grip with the fingers, and keep the elbows relaxed and away from the body.
1.
Warm up the horse until its body is soft and relaxed, then return to a complete stop.
Position the crop so that you hold it from both ends, with your palms facing down and about 18 inches apart.
Keep the reins in your hands and wrap your fingers around the stick.
Hold your elbows, hands, and forearms slightly wider than shoulder width; as if you are holding a small tangerine under each armpit.
While keeping the crop in this position, begin working with the horse at a walk, trot, and finally canter, moving along the side of the arena.
© Amy K.
Drago 2.
While maintaining the "frame" of your body and keeping a consistent connection with the horse's mouth, lengthen and shorten its stride, always driving it from your leg towards your hand.
At the same time, follow the movement of the horse's head and neck with your arms.
© Amy K.
Drago 3.
Then try riding in a circle while keeping your arms in the same frame position.
During the turn, the entire frame rotates together; that is, the shoulders, arms, and hands all move together to keep the shape of the frame stable.
Meanwhile, your legs should continuously be in contact with the horse's sides, always asking it to push towards your hands and lift up.
© Amy K.
Drago Problem: Many riders mistakenly think they need to help their horse jump over an obstacle by jumping ahead of the horse.
They start giving with their hands before the horse leaves the ground, rise out of the saddle, lean their upper body forward, and throw their hands onto the horse's neck.
George Morris describes this very bad habit as "lifting the throw on the horse's neck."
Jumping ahead of the horse is of no benefit and actually puts the rider in a weaker position.
If your distance to the obstacle is too long and the horse takes an extra short step, there is a risk that your center of gravity will fall too much onto its neck, which can lead to a fall.
If the distance is too tight, putting weight on the horse's hands makes it more difficult for it to jump.
Solution: Two exercises for body control — crossing over a line of three cavalettis and jumping over a small obstacle towards a ground pole — allow you to feel the difference between jumping ahead of the horse and engaging key muscles to maintain balance and centering of the body on the horse while jumping.
Finish each exercise with a correct and coordinated pass with the horse, focusing on the feeling of contact between the inside of your lower leg and the horse's side, and the pressure of your foot on the stirrup to keep the lower leg steady; just like the exercise with the lunge.
A few steps before the first cavaletti or obstacle, think about the feeling of pushing down on the stirrups and sending your legs slightly forward.
At the same time, engage your abdominal muscles.
These two actions will slow down your upper body and help you move forward with the horse, not ahead of it.
For the first exercise, you should set up three cavaletti in a row; the distance from each to the next should be three counter steps, which is about 48 feet, and their height should not exceed 1 foot.
Your entry into this line will be at a trot, and then you will go three counter steps to the second cavaletti and three counter steps to the third cavaletti.
For more information about riding in this line, check the diagram and photos above.
The second exercise, shown in the photos on page 98, consists of a small vertical obstacle, about 2 feet and 6 inches, followed by a ground pole about 18 feet away.
This pole helps you regain and reorganize your balance and that of your horse immediately after the jump by using good body control in the very first step after landing.
Approach the vertical obstacle with a smooth counter, ride with a light and complete seat, and focus on the strength of your foot placement learned in the lunge exercise.
In the last step before the jump, put 100 percent of your focus on engaging your core muscles and feeling the pressure of your foot in the stirrup.
Like the cavaletti exercise, the goal is to stay directly above the horse's center of gravity throughout the jump effort.
This time, releasing the reins can be a bit more generous, as the size of the obstacle is slightly larger.
Why these exercises are effective: These exercises allow you to safely experience the negative consequences of jumping too far ahead.
They also provide you with specific strategies to support proper rein release and timing using your core muscles and legs.
Staying focused in the center and slowing down your upper body movement over the obstacle encourages the horse to spend more time in the air and complete its jump arc.
The more you experience this soft, slow, and focused release, the more it will become a natural part of your riding.
Exercise 1: Set up three consecutive cavaletti in a line, so that the distance from each to the next is three counter steps, about 48 feet, and the height of none exceeds 1 foot.
1.
Approach the exercise at a sitting trot.
Only when your horse begins to lift off the ground, give a very brief release with your hands on its neck and bring your body slightly forward.
For most riders, this feeling arises as if you are a bit behind; this is completely natural!
2.
As your horse goes three counter steps to the next cavaletti, maintain a light and half-open seat.
If it lands at a trot, which happens often due to the small jumps, make a transition to a counter and continue towards the cavaletti.
3.
Maintain the same position and keep your gaze up over the second cavaletti and during the three steps to the third cavaletti.
4 to 5 steps after the last cavaletti, come to a complete stop calmly and without tension.
4.
Then, at the moment of takeoff, intentionally overdo the forward position in the jump.
Notice how this disrupts your balance and timing, making it much harder to organize your position after landing.
Exercise 2: Ground pole after vertical obstacle 1.
When your horse is preparing to push off the ground and jump over the obstacle, engage your abdominal muscles and apply more pressure on the balls of your feet while slightly relaxing your heels.
This helps stabilize your foot position.
Maintain this feeling while passing over the obstacle in the air and stay directly above the horse's center of gravity.
© Amy K.
Drago 2.
This helps you stay balanced, completely coordinated, and connected with the horse at the moment of landing; while he is taking the counter canter to the jump.
As a result, the horse can fully focus on the jump, not on you.
© Amy K.
Drago 3.
When you pass over the jump in a canter, continue to balance your weight over the horse's center of gravity.
© Amy K.
Drago mistake: Leaning my upper body onto Ernie's neck not only puts me in an unstable position, but it is also evident from his expression that I am making it harder for him.
The landing impact—even after a small jump—throws me more onto his neck, makes his front end heavy, and causes me to be unprepared for the next jump.
© Amy K.
Use your core muscles in riding, we often neglect our core muscles, namely the abdomen and lower back.
Many riders try to correct their upper body position by arching their back or pulling their shoulders back.
This approach overlooks one of the most important and largest muscle groups in the body and one of the valuable levers for controlling the upper body.
To engage your core muscles, pull your abdomen towards your spine.
Maintain this contraction throughout your riding to control your upper body position.
Talk to breathe many riders become anxious and then stop both breathing and feeling.
The best way to keep your breathing going is to talk to your horse.
While doing these exercises, sing a song or speak out loud.
This strengthens your lung capacity, keeps everything much looser, and helps you make better use of your core muscles.
About Sandy Ferrell Sandy Ferrell began riding at the age of 4 and then had a brilliant career in the pony, hunter/jumper, and equitation divisions in the junior section.
At the age of 23, she launched her business named Royal Show Hunters.
Ferrell and her students have won multiple championships in A-rated horse shows.
She has been named the top regional professional six times in the World Champion Hunter Rider competition and was also the winner of the 2008 WCHR Hunter Spectacular.
In 2018, Ferrell, with the horse Hemingway owned by Stephanie Bulger, won the first U.S. Hunter Jumper Association 3’6″ Green Hunter Incentive at the Kentucky Horse Show and also the Grand Champion Green Hunter title at the Pennsylvania National Horse Show.
She divides her time between Bel Air, Maryland, and Wellington, Florida.
Source: Practical Horseman – Training