Walking the jumping course with a horse suitable for your horse
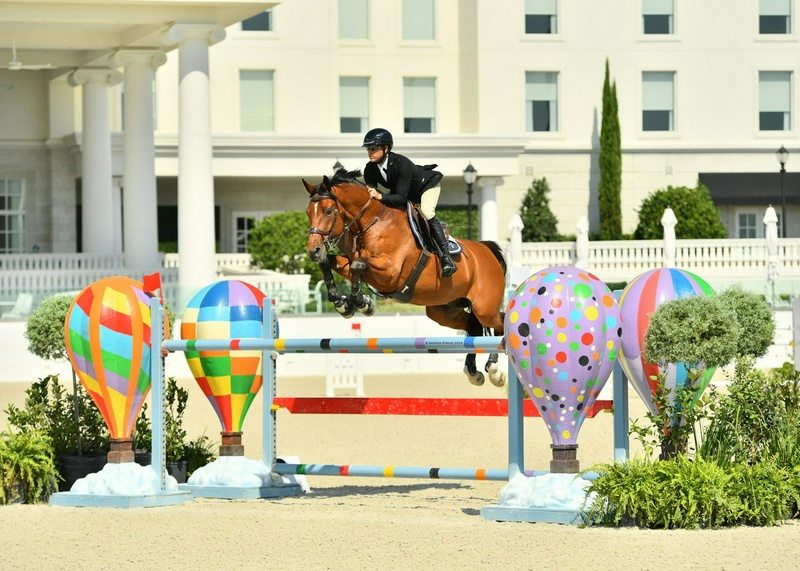
In most years of my life, I have navigated show jumping courses more based on instinct and intuition.
However, over time I have learned that while relying on the rider's instinct is valuable, there should always be a plan; and even a backup plan.
In this article, I will explain how to properly walk a course to reach an effective attack plan; noting that this plan may change depending on the type of horse you are riding and also the external conditions.
Then I will introduce a few exercises that help you answer common questions during the course so that when you and your horse enter the arena through the entrance gate, you are calm, prepared, and in control.
To successfully navigate show jumping courses, you must use the course walk to design a plan.
Here, I will execute my plan with Gold Diamant du Plessis, or "Goldie," an 11-year-old Belgian Warmblood gelding, in the fifth week of summer 2024 at the World Equestrian Center – Ocala.
Course evaluation The main objective of walking the course is to see what questions the course designer has posed to the rider and to plan for them according to your horse.
Next, I will explain how to do this for different sections of the course: the first obstacle, related distances, combinations, and the last obstacle.
Determining the rhythm of the work: The first obstacle When you start walking the course, think about the most direct and simplest way to approach the first obstacle so that your horse clearly understands where it is going.
Consider which direction is easier for him or, depending on the layout of the obstacle, which line of approach looks more inviting.
Is there space between the obstacles that you can pass through?
Are you supposed to stay next to the rail?
It can also be helpful to determine where you should be in the last two strides before the obstacle to approach it with complete focus and in a straight line.
To do this, stand with your back to the midpoint of the approach side of the obstacle and walk two riding strides away; that is, 12 steps.
Another factor that is important when approaching the first obstacle is the line of movement towards the second obstacle.
If you need to make a rollback turn around another obstacle or perform an inside turn to reach the second obstacle, it is better to jump more from the outside of the first obstacle to have enough space for landing and then turning inward.
The purpose of walking the course is to determine what questions the course designer has raised and how to respond to them with a plan that best suits your horse.
Once you have a good understanding of the course, visualize the rhythm and speed you need to have to set the pace for the entire course.
You should send your horse forward into the course with a rhythm from the very beginning so that as you approach the first obstacle, you can balance him on his hindquarters.
From there on, maintain that same speed and rhythm until the last obstacle.
Horses are creatures of habit; therefore, the more consistent their rhythm is, the more boldly and comfortably they will perform.
Riders often make the mistake of starting the course at a slower speed towards the first obstacle and then gradually increasing speed throughout the course.
If you start too slowly, then increase speed and realize that the rhythm has become too fast and you need to slow it down again, you will have an uncoordinated and tense ride.
Always choose consistency.
Considering the horse you are riding is also very important.
Is your horse more of the type that needs to be ridden forward with the leg, or is it a sharp and sensitive horse?
This determines how you approach the first two obstacles and how you manage the turns.
If your horse is the type that needs to be driven forward more with the leg, establish the counter much before the starting line and keep it in front of your legs.
You may need to approach the first obstacle with more emphasis, and after landing from each jump, you may also need to send it forward again to maintain the right rhythm for the next obstacle.
If you have a sharp and fiery horse that is always looking for obstacles, you should not use all the space in the arena and give it the chance to get more excited.
It’s better to keep your line compact and organized and ensure that your horse does not have the opportunity to look at the obstacles for too many strides, as it may then jump from the distance you have chosen.
Related distances – The straight lines of the next part of our course walk relate to the related lines.
I like to approach the first obstacle like a single obstacle because I don’t want the first obstacle to create problems for the next distance.
When I land from the first obstacle, then depending on how my approach to the obstacle has been, I focus on making the necessary adjustments.
Walk the line and assess with awareness how many strides you will have between the two obstacles; whether the distance is short, forward, or normal.
Also consider whether your horse has a long or short stride.
In this example of the article, this line is a meter shorter for a full five strides.
If I encounter a line like this in competition, it becomes clear to me that I need to approach the first obstacle with my normal rhythm and speed and then compensate for this one meter shortfall by landing and immediately adjusting the horse so that I do not have to make the adjustment right in front of the second obstacle of this line.
My rule number one is: if you need to adjust for a distance, do it at the very beginning of the line so that you do not interfere with your horse’s work in the last two or three strides.
Related distances – Curved lines try to recognize the actual path of the curved line that the course designer has in mind, but be aware that there are other options depending on what is better for your horse and more compatible with its rhythm and speed.
You can stay on the inner line for a direct approach, ride the actual path, or have an extra stride by choosing the outer line.
From the landing side of the first jump, walk a straight line and find the turning point; the exact place where you need to change direction to go straight to the second obstacle.
In this example, I walked four strides and passed the turning point where I should have turned towards the second obstacle.
This tells me that I need to turn towards the second obstacle somewhere between the third and fourth strides.
I walk the path again and shift my line slightly towards the inner line.
Now I am on the fourth stride, but since I have stayed on the inner line, this time I have a direct path to the second obstacle.
1.
In curved lines, you have many more options for distances.
This line is designed for seven strides in the arena, but I am trying to ride it in nine strides.
To do this, I prepare Goldie with a more compact stride and place her slightly on the outer side of the first jump.
©Stephanie G.
Raf 2.
I move towards the outside of the line and open the apex of the course wider, while maintaining a forward and balanced canter, and my eyes are focused on finding the right distance, keeping the second obstacle in view.
©Stephanie G.
From the pivot point, I step straight towards the second obstacle, placing me at a one-stride distance from a true seven-stride.
This tells me I have two options.
I can stay a little on the inside line and convert this line into a true seven-stride by tightening the curve to the right; or I can take my horse a bit outward and make it an eight-stride by opening up the apex of the line.
To be sure, I walk this course in reverse from the outside line to see if I reach eight strides, which I do.
3.
You can see that our distance to the second obstacle has been good, as the jump arc of Goldie is right on the center of the oxer.
©Stephanie G.
Raf, if you have a forward horse, the seven-stride will naturally present itself.
But remember that just because you walked a line in the course walk as a seven-stride arc, it doesn’t mean you have to maintain that seven strides under all circumstances.
Keep your mind open, because depending on how your horse approaches the first element of this line — for example, if it comes in with a bit of a rush, or hesitates because it looks at the obstacle, or crosses the line too forward — the plan may change.
You have options based on what is more natural for your horse.
Just don’t overdo it.
For instance, if you have walked an arc line as a seven-stride, you don’t want it to stretch to 10, 11, or 12 strides; just as you don’t want it to finish on five strides, unless you are racing for a million dollars and this is the last jump of the barrage.
Combinations come next; a part that is always exciting and sometimes scary.
Combinations usually consist of two or three jumps in succession with one or two strides in between.
In this example, we have a three-part combination: vertical, oxer, vertical.
You should approach combinations the same way you approach single jumps and related distances.
If you approach the first obstacle like a single obstacle, with the right canter and a horse that is forward and balanced, section B will not cause any problems.
Many riders fear combinations and worry that the rapid succession of all the elements will cause trouble.
How to ride a combination depends on the distance between A and B, as well as B and C.
These distances can be standard, short, or long.
In this scenario, we have eleven strides from A to B and also eleven strides and a bit more between B and C.
That "eleven strides and a bit more" tells me that I need to cover a little more ground over section B.
So, you should approach A with a steady rhythm and like a single jump, and then apply pressure to the last jump just as you approached the first obstacle with the same level of precision.
Knocking the pole of the last obstacle on course is usually due to a rider error, as we think the job is done and we have reached home, while we have not yet arrived.
When you cross the finish line, that’s when it’s time for joy and a clenched fist.
Now that we have walked the course, you know how important it is to have a plan and strive to stick to it.
But it is equally important to be ready to adjust the plan in the moment.
Recognizing distances is important, but it is not the final criterion for decision-making.
Unexpected events can always happen, so you need to be flexible and responsive to them.
Now that I have explained how to analyze walking on the path and arrive at a plan, I will also introduce a few exercises that you can do to help your performance on the path.
Exercise 1: Circular and direct approach layout: Place a small vertical obstacle that can be jumped from both directions on a circle.
In this exercise, you will work on finding the right distance and getting comfortable approaching the obstacle; all while maintaining a steady rhythm and speed as you change your line of travel.
You will notice that there are several options for achieving a good distance, which reduces the pressure of finding the "perfect distance."
Start with your left hand and maintain your rhythm and speed.
When approaching the small vertical obstacle in a counter from a circular direction, imagine that the top pole has different sections and move your gaze from left to right across it to find the best point in terms of distance.
First, you will look at the left side of the pole since you have exited the left turn.
(When you do this exercise to the right, you will first look at the right side of the pole.)
If the distance on the left seems a bit deep, be patient and allow your horse to lean to the right.
This will naturally create an extra step without disrupting his rhythm.
When you are in a suitable distance, straighten him out and complete the jump.
Whatever you do, do not try to find the distance with your hands.
This will disrupt your rhythm and tempo, increasing the likelihood that the horse will take a short step or reach a deep distance; a situation that can lead to an unbalanced and difficult jump or even a stop.
Horses do not seem to worry much if you are a bit close or a bit deep, as long as you approach the obstacle with a good tempo, forward motion, and rhythm that they can build the jump from.
But when we do not see the distance and try to change the tempo or stride length at the last moment, this is not something that horses welcome.
When this exercise goes well on the left lead, do it on the right lead as well.
Once that is good, you can make the exercise more challenging by trying other options.
Start by looking for the first option, but then deliberately aim for a different distance and guide the horse slightly in or out.
This will help you find more relaxation, as you learn that there are several correct choices.
When I am cantering towards the small vertical obstacle on the circular path from the left, I make sure that Goldie has a good forward tempo and I look at the top pole of the obstacle from left to right to determine where I need to place him to achieve a suitable distance.
If this exercise is too difficult or you have trouble seeing the distance, practice it first on a pole.
Approach it exactly as you would when you want to jump an obstacle and try to place the pole in the center of your horse's stride.
When you progress well with the pole, try it with a cavaletti and then move on to a small obstacle.
If you find this exercise too easy, increase the radius of the approach to raise the difficulty so that your path is straight in the last four or five strides before takeoff.
The essence of the exercise remains the same.
When coming from a turn that now starts a bit earlier, you still need to check the pole section by section to see where your stride falls—inner, middle, or outer.
If this situation is too challenging, returning to the circular path helps you gradually improve your approach stride length.
Gradually lengthen the approach so that you feel comfortable finding your sweet spot from a greater distance.
Exercise 2: Related straight lines layout: Set up a five-stride line consisting of two vertical obstacles spaced 23 meters (75 feet) for home distance and 24 meters (78 feet) for competition distance.
When we walked this related line, it was a home five-stride.
First, see how the striding goes the first time you pass through it.
Start with a left lead, get a good rhythm, approach the first obstacle with a circular approach, and commit to the distance you have chosen.
It's okay if everything doesn't go exactly as planned.
When I rode this line, I was a bit flat and deep for the first obstacle, so I thought I would have a calm and steady six-stride.
But I over-corrected and ended up with seven strides.
If this happens, assess the situation and try to correct it.
For example, if you added two extra strides, start again with a bit more rhythm so that your horse can clear the first obstacle better and not land too short.
Once you achieve the five-stride, try to execute a steady six-stride, which should only require a minor adjustment.
Approach the first obstacle just as you did for the five-stride.
As soon as you land, shorten your horse's stride a bit and create space for the six-stride so you don't have to keep negotiating until the last stride.
In the last two strides, make sure you are not interfering with your horse and allow the obstacle to come towards you.
Try this line in five, six, and seven strides and pay attention to the small adjustments needed to achieve the correct distance.
Exercise 3: Arched lines layout: Place a vertical obstacle in a seven-stride arched line to an oxer.
The distances should be 31 meters (101 feet) for home distance and 32 meters (104 feet) for competition distance.
Now we want to work on arched lines.
When we walked this line, it was a very straight seven-stride.
If you have a horse that shifts a bit after jumping or has a shorter stride, achieving seven strides may be difficult.
For the first time, try to execute it in eight or nine strides.
Approach the first obstacle in the arched line as if it were a single obstacle.
Then count the strides, look at the rail of the second obstacle, and decide whether to place the horse on the inner, middle, or outer path, and then straighten him in the approach.
Execute the exercise and try different paths to see if you can achieve seven, eight, and nine strides.
When I rode this line for the first time, the "competition" seven-stride actually turned into a steady nine-stride because I took my horse to the outer path.
The second time, I was able to walk it in eight strides by changing the approach to the middle line while maintaining the same rhythm and pace.
After trying again to execute the nine strides, my horse had a different opinion, and in the end, it became eight strides.
Remember that even if you have planned for a specific distance, if you feel that another distance is more natural for your horse, it’s fine to change your plan.
It’s better not to rush into making adjustments at the last moment to reach a number you have predetermined.
If I insisted on definitely fitting in the nine strides just because that was my plan, I would ultimately end up at the obstacle with a very unhappy horse that was fighting the bit and getting deep at some point.
I tried for nine strides again, and this time I was able to execute it; because from the very beginning, I prepared myself even earlier and brought my horse more to the outside.
However, I had a horse under me that was moving forward and accompanying me to the obstacle.
When you are galloping with a horse on a jumping course, things do not always go exactly as you have in mind from the course walk.
There is never a perfect distance.
If you arrive a little long or a little short, as long as your horse is moving forward and balanced, it won’t be an issue for him.
Remember that having a great plan is good, but doing what is best for your horse in that moment is more important.
About Roni Reimer Roni Reimer.
Roni Reimer, a German show jumping rider, has successfully participated in FEI competitions and national events.
He has trained under two German Olympians, Franke Sloothaak and Paul Schockemöhle, and has made a name for himself as a rider and trainer throughout Europe and North America.
Roni and his wife Chanel run the sales and training business "RCR Equestrian" at Diasy Stables in Ocala, Florida.
Source: Practical Horseman – Training