10 tested solutions for improving the rider's situation
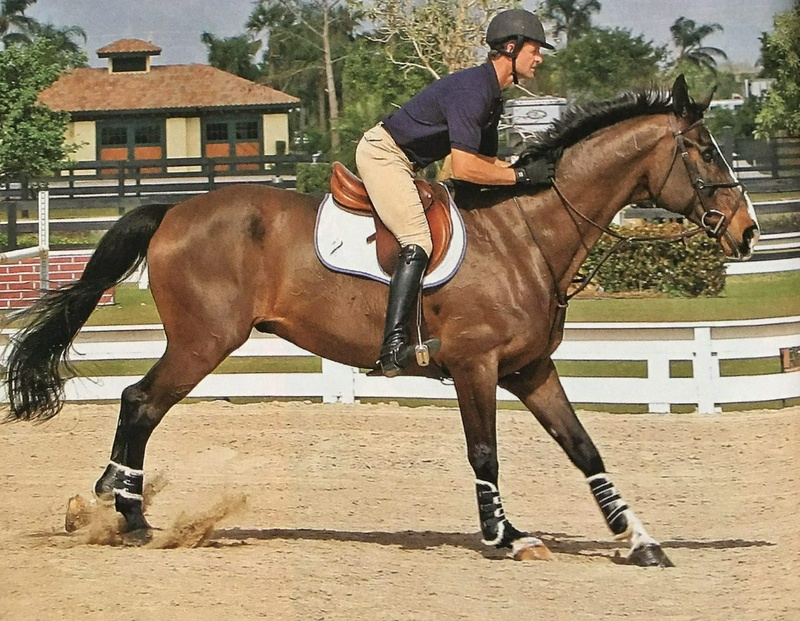
We have seen and heard your requests for help in online forums, letters and emails, Facebook page, and the photos you sent for the "Jumping Clinic" section.
You want to know how to fix those annoying issues with your body position; the same problems that you have tried to get rid of but still can't.
To help, the Practical Horseman editors searched through 15 years of past issues and thousands of photos; "Can you believe someone actually wore that?" to find their favorite solutions for the toughest challenges related to your riding position.
Enjoy reading the advice from top experts; advice that is just as valuable today as when it was first published in our magazine pages.
When you read them, you will realize that most of these problems are interconnected.
So it’s no surprise that alongside the exercises presented here, "no stirrups work" is also suggested in all the articles.
(Note: Remember that some of these so-called "classic" photos were taken years before the current helmet regulations were enforced. As always, we strongly recommend that you wear an approved helmet whenever you ride.)
1.
I look down; why it’s problematic: When your head is not in the correct alignment, you may collapse forward from your upper body, lean to one side, or your head may constantly move up and down or side to side, resulting in both your field of vision being disrupted and your ability to turn the horse being reduced.
Solution: Your head is very heavy; therefore, when you hold it up and align it along your spine—imagine your chin being almost parallel to the ground—you help align the rest of your upper body; just like a column of building blocks where each part is balanced with minimal pressure on the other.
This alignment helps you ride with relaxed and calm shoulders, arms, and back.
Start in the arena with a light trot and hold both reins with a light contact in your outside hand.
Raise your inside hand directly in front of you at shoulder height and keep your gaze on it; then open it out to the side, and rotate your extended arm and hand from the shoulder, bringing it back as far as is comfortable.
While maintaining a steady light trot and still looking at your inside hand, change direction and repeat the same exercise.
This exercise seems simple and is indeed simple; however, if you do it for a few minutes every time you ride, it will help you strengthen your balance, feel, and independent use of your eyes and head.
— Missy Clark, April 2000
2.
I hunch my shoulders and my chest collapses; why it’s problematic: You round your shoulders forward, your chest collapses, and you shift your center of gravity ahead of the horse's center of gravity.
This tension transfers to your arms, and your forearm muscles visibly contract.
When this posture spreads through your body like a virus, your knees stick to the horse; and this turns them into a point of support, causing your heels to rise and your lower leg to move back.
With this hunched body and dropped chin, breathing becomes difficult; just as judging the exact distance to the next obstacle will also become harder.
Solution: In the walk, relax and shake each of your hands; like when you want to brush away a pesky insect, to truly release the tension from your body.
Then, as you lift your shoulders towards your ears, take a deep breath; this helps to calm down, lift, and open the chest.
Next, lower your shoulders back and down.
Whenever you feel your shoulder muscles tense and as if your shoulders are being pulled up, repeat this exercise.
— Kitty Fletcher, January 2001 Ideal tension-free position; a demonstration by Patricia Griffith, hunter-equitation trainer: open chest, shoulders back and down, and a soft contact with the horse's mouth.
3.
I lean forward over the jumps with my upper body why it is problematic: as you approach the jump, your upper body falls forward, your knees bend, the lower part of your leg slides back, and gradually you put your weight on your hands.
You rise so high on the horse's neck that the horse falls on the forehand and can no longer push from behind.
Instead of allowing the horse to come up during the jump and close your body angle, you close this angle earlier and "detach from the ground before the horse does."
In this situation, the only option for your horse — if it is a willing and honest horse — is a clumsy and weak jump that is uncertain how it will come out; or it may completely hit the jump.
If the horse is not that honest, it may run out or circle; or suddenly stop and throw you to the ground.
Solution: Shorten the stirrups by two or three holes and pull yourself up; this will cause the inner surface of your leg to sit flat against the horse's body and the ball of your foot to be higher than your heel.
This firm support automatically places your upper body over your center of gravity; when your support is in the center, leaning forward becomes almost impossible.
It also forces you to ride the correct movement from behind the seat to the thigh, rather than just going up and down.
Additionally, it positions your hands and arms in front of your body.
"Stirrups that are too long cause you to use either your lower leg or knee as a support, and neither is effective."
— Tony Workman, November 1998 Tony Workman keeps his stirrups short and pulls his body up to create a firm support; a support that automatically places the upper body over the center of gravity and prevents leaning forward.
4.
I jump ahead of my horse's movement why it is problematic: when you jump ahead of your horse's movement, you position yourself in front of the horse's center of gravity.
Just like when you lean forward with your upper body, this disrupts the horse's balance and makes it difficult to push off the ground and detach for the jump; especially when you have a deep distance and are very close to the jump.
Jumping ahead also reduces your stability and control and makes you need more time to regroup after the jump.
If your horse stumbles or makes a mistake, its ability to recover decreases, and the likelihood of being thrown off over its head increases.
Constantly jumping ahead of the horse's movement can make your horse quick, restless, and nervous.
Solution: Place a small cross-rail or a short vertical jump about halfway down the long side of the riding arena and put ground poles on either side so you can jump over it from both directions.
Take a good canter to the right, get into a two-point position, and pass through the corner.
Choose a focal point at the end of the arena; this is especially important when you have a habit of looking down at the ground.
Focus on staying in the two-point position as you approach the jump and while jumping over it; ensure your hip angle is about 25 degrees and maintain that position without excessively throwing your body forward, rising too much out of the saddle, overly releasing the reins, or bending down.
Only go to the jump in a two-point position with a canter and jump over it.
When you feel confident doing this exercise with stirrups, try it without stirrups; this will automatically prevent you from hovering above the horse and rising too much out of the saddle.
— Jeff Cook, November 2006 Jeff Cook demonstrates the two-point position he recommends.
5.
I lean over the jumps. Why it’s problematic: Leaning down is a mistake that happens at the last moment; almost exactly when the horse's front legs leave the ground.
You don’t lean in the approach to the jump, but most riders who stay behind the horse's movement in the approach end up leaning even more than those who approach in a half-seat because they try to catch up with the horse's movement.
Leaning causes your seat to go too far forward and up, and your knee angle to become almost straight.
When your hip joint closes up this much at the top of the jump, you are usually still too closed when the horse’s hooves hit the ground.
This disrupts your balance and causes you to pivot on your knee; as a result, your lower leg goes back and your heel comes up.
All of this happens just when you need your leg to be confidently underneath your body, your heel to stay down, and your hip angle to open so you can return to a more vertical position; there should also be a straight line from your elbow to the horse's mouth to support this position.
Solution: Start with a simple line of two short jumps: a pair of cross-rails or a 2-foot vertical jump spaced about 60 feet apart.
A horse with an average stride can usually jump the first jump at a trot and then canter to the second jump in 5 strides; if your horse has shorter or longer strides, adjust the distance so that these 5 strides are comfortable for him.
(The goal of this exercise is to give you the feeling of keeping your body completely still while the horse jumps, not to lengthen or shorten your stride between the two jumps.)
Take a trot and head towards the first jump.
As soon as you see the two jumps in a line, and while you are still a few strides away from the first jump, get into a two-point position.
Gather the reins in one hand and place that hand in a short release position on the neck.
With the other hand, hold the mane about halfway down the neck; almost the same place where you would place your hand in a long release on the neck, so that there is still a slight bend in your elbow.
Holding the mane this way isolates your upper body and prevents you from looking down during the jump.
At the end of the line, choose a fixed point to look at; for example, a tree or a fence post, or if you are in an indoor arena, a pole.
Then keep your head up and look ahead throughout the course.
If you look down, you usually bend down yourself.
Focus on keeping your upper body still when the horse jumps the first obstacle, countering in five strides to the next obstacle, and then jumping the second obstacle.
Keep your weight on your heels and do not let your hip angle change.
— Missy Clark, June 1998 A few strides before the vertical obstacle, Missy Clark got into a two-point position, gathered the reins in one hand, and placed that hand in a short release position on the neck.
6.
On course, using too much hand is problematic: it causes you to have trouble seeing distances after turns or to add an extra stride in lines to reach a precise distance.
Solution: Place a pole on the ground, a cross-rail, or a short vertical obstacle where you have enough space to execute a figure eight with two relatively large circles; that is, jump the obstacle and steer right, then jump the same obstacle again and steer left.
The less experienced your horse is, the larger the circles should be at the start.
As the horse becomes more confident and you also feel you can guide him, you can make the circles smaller and tighter.
Jump the obstacle straight, then circle right and look at where you want your horse to go.
If the horse starts to drift inwards from the circle, open the outside rein to invite him back to the path and do not let his shoulder fall out; meanwhile, guide his inside leg towards that outside rein and let the inside rein just rest on his neck.
If he becomes heavy on the outside rein, open the inside rein and lay the outside rein across his neck.
You should guide him on the path with the reins open and separated, not by suddenly pulling and turning him around.
When you reach halfway around that circle, meaning 180 degrees away from the obstacle, consciously start to soften your hands, shoulders, and elbows and continue this softness down to your hands so that both your body relaxes and you can see the distance and allow yourself to see it.
— Chris Kappler, April 1999 To practice riding with soft hands, ride a figure eight; after the obstacle and to the halfway point of the circle, maintain normal contact with the horse's mouth (dotted line) and then consciously soften your hands further down the path to the obstacle (solid line).
7.
When sitting in the canter, jumping up and down in the saddle is problematic: your rhythm is not in sync with the up and down movement of the horse's back.
You may move well with the horse on the way up, but you do not return quickly on the way down.
This means that when the horse comes up again, you are still coming down.
As a result, the saddle hits your seat, this impact throws you further up, and you come down even later.
Solution: Keep the canter as calm and smooth as possible.
In a working canter, your up and down rhythm is about 75 beats per minute, but in a sitting working canter, this rhythm reaches about 150 beats per minute; that is, twice that of a light canter.
And generally, the faster a movement is, the more coordination you need to execute it.
Therefore, when you are training and want to synchronize with the horse's movement while also paying attention to all the other points, slowing down makes sitting trot easier and more achievable.
Take a few steps of sitting trot; then, before your form falls apart, return to walk.
If you notice that you are losing your body position, getting tired, or falling out of rhythm while increasing the number of sitting trot steps, immediately return to walk and gather yourself again.
The only way to learn a movement well is to do it correctly.
If you continue after your body position has deteriorated or you start bouncing up and down, you will not learn to sit well in the saddle.
Instead, you will be practicing poor sitting.
Also, think about pushing the saddle down.
Whenever you are bouncing up and down in the saddle, you feel like you have lost control.
But pushing the saddle down is another way for your hip joint to flex or close, and almost automatically, you come down faster.
And believe it or not, this action gives you the feeling that you have regained control in a situation where your instinct tells you that you have none.
— Sandy Howard, October 2006 For practicing sitting trot, take a few steps of sitting trot — as shown by Tanya Wick, a dressage coach — and return to walk before you lose your body position.
8.
My lower legs are unstable; why it is problematic: you constantly lose your stirrups, have trouble keeping weight on your heels, your lower leg slips behind the girth, and your upper body leans forward over the jump, no matter how hard you try to maintain stability.
A correct and stable lower leg is very important because it forms the foundation of your entire body position.
Solution: Shorten the stirrups so that the angle behind your knee is approximately between 90 to 105 degrees.
The stirrup leather should be vertical to the ground, and an imaginary straight line can be drawn from behind the heels to the hip and then to your shoulders.
Release your weight into your heels and turn your toes out about 35 to 45 degrees so that the strongest part of your lower leg — the inner lower part of the calf — rests against the horse's side.
If your toes are not angled out enough, it will be difficult for you to keep your lower leg in the right place; if they are angled out too much, the knee will come away from the saddle, your calf will stick to the horse's side, and your foot will not have the necessary stability.
To get used to the correct stirrup length and focus on keeping the lower leg in the correct position and strengthening it, do this simple exercise of sitting and rising trot: start the sitting and rising trot with your foot in the correct position and your body about 25 degrees ahead of the vertical line.
Let the horse's movement guide you up from the saddle.
At the same time, feel that about 20 percent of the pressure from your foot is transferred from the calf to the knee and thigh; but remember that your lower leg should still stay next to the horse's girth.
To stabilize the position of your lower leg, when you reach the highest point in the sitting and rising movement, consciously try to transfer your weight to your heels.
When coming down, use your thigh muscles to gently and softly — not with a thump — sit your front seat on the saddle.
Continue this movement until you feel tired and your feet come out of the correct position.
Then take a few minutes to rest in the walk and then resume the sitting and rising trot.
— Frank Madden, November 1995 9.
I push with my thighs and knees; why is it problematic: pushing with the thigh and knee usually causes your heel to turn outward and the lower leg to come out of place, floating back and — when in trot — constantly hitting the side of the horse with repeated bumps.
If a spook, a buck, or any other occurrence causes your knees to lose contact with the saddle, you’re done — because what keeps you on the horse is lowering your center of gravity as much as possible: down to the heels.
If your center of gravity stops at the knees, you will separate from the horse!
Solution: in walk, trot, and finally canter, take your feet out of the stirrups or cross them and do these exercises: let your legs hang freely; then straighten and bend your knees alternately so they move independently of the horse's sides.
When your left leg straightens, your right leg bends, and in the next step, the opposite.
Lift the knee straight up — not outward — and hold it just enough to break your pressure contact, then let it drop back down.
— Landon Gray, March 1999 To avoid pushing with the thigh and knee, let your legs hang freely, then straighten and bend your knees alternately.
When your left leg straightens, your right leg bends, and in the next step, the opposite.
10.
My heels don’t stay down; why is it problematic: rising heels cause your upper body to tip forward or fall back, especially when jumping obstacles.
Solution: first, bring your horse completely to the front of your lower leg: drop your heel down and stretch your leg to ask him to go forward.
If he doesn’t respond with thrust and more energy, give a tap with the whip, behind the lower leg, or give a light reminder with the spur.
Now in walk, go to the classic and correct two-point position.
To avoid sitting only on your knees, do this step by step: first, bring your hands forward and hold the horse's mane to avoid putting pressure on his mouth.
Then, while the front of your leg is on the stirrup and your little toe gently touches the outer branch of the stirrup, drop your heel down and start to rise.
Then open your knee and finally close your hip joint.
Let your weight drop down.
You should feel the inside of your thigh, the inside of your knee, and the upper inside of your lower leg close to the horse's side; not because you are clinging, but because you are stretching.
Drop your heel down as far as you can and do this by releasing your ankle sideways, not up and down; the ankle doesn’t work that way.
In each of the three movement steps, practice this balanced two-point position until it becomes completely automatic for you.
— Pam Baker, March 2001 Spending enough time in the two-point position, as George Morris demonstrates here, plays a key role in turning "heels down" into a habit.
Source: Practical Horseman – Training