Improving proper body posture in Chaharnal
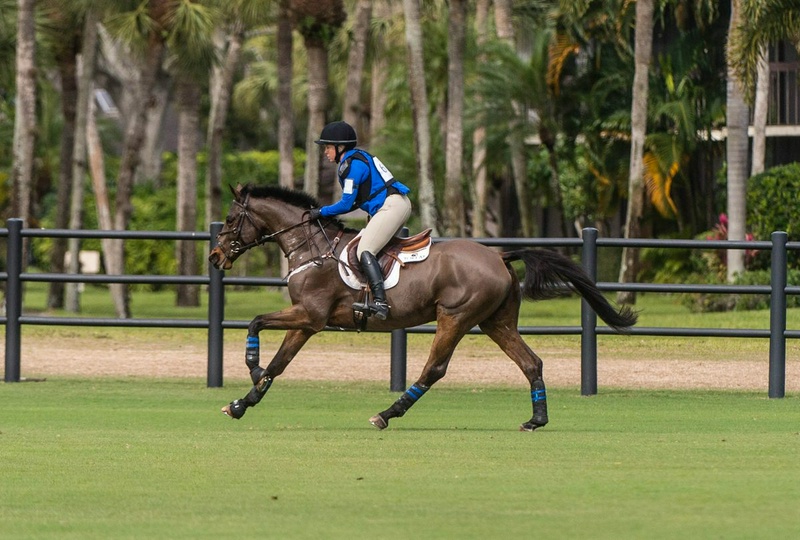
When a new student comes to me, I usually say: "Don't take it the wrong way, but for now, you're not supposed to jump."
Before we work on the jump, I want my riders to work on their sitting position and their bodies; especially on their body position in Chaharnal.
Otherwise, we will have to go back later and fix the body position issues; issues that become a bigger problem as the rider progresses.
This happens because horses move the way we ride them: horses want to feel secure, and part of that security is knowing that their rider feels secure too.
If we ride out of balance, our horses will also be out of balance.
I myself review my body position at the beginning of each year and see where I can improve.
Some eventing riders think that if their horse jumps and they stay in the saddle, what does it matter?
"I don't compete in hunters.
It doesn't matter how good I look."
But what I teach is not about looking good; it's about efficiency, proper performance, and correct body positioning.
The easier you are to carry for your horse, the more satisfied your horse will be.
A satisfied horse also performs much better.
My goal as a rider is to make myself as simple and light as possible for my horse to carry, and I have the same goal for my students.
Colin Rattledge, a five-star eventing rider, explains what the key to achieving a secure position in Chaharnal is; that is, riding in balance so that you can act efficiently, effectively, and correctly.
When there is no balance, let's first talk about the common body position errors that I usually see and how they affect your riding.
To fix the leg, riding books and many trainers usually say to close the knee.
But they don't specify that you shouldn't close the front of the knee, while most people push exactly with that part.
When you push with the front of the knee, you close your inner thigh.
Then your lower leg usually swings back.
At this stage, you become a physics problem: if your lower leg goes back, your upper body wants to lean forward.
For the horse, this position is like trying to carry a small child who keeps bending back and forth.
You lose your focus because you have to keep finding your balance again and your attention is on where your body is positioned.
In the same way, the more movement there is on the horse's back, the less focused he becomes on his job.
On the jump, if your way of applying pressure is wrong and causes your lower leg to swing back and your upper body to lean forward, you either take your horse out of balance or overcompensate; that is, you fall back and hang on the horse's mouth to maintain balance.
The result of both situations is that your horse may slow down at the jump or attack the jump with speed and imbalance.
One common mistake I see is that the rider applies pressure with their knees and their lower legs swing back; as a result, their upper body leans forward.
As can be seen from the expression on Roullet's face, this position can distract the horse because the rider is constantly moving and readjusting their balance.
The red line clearly indicates that my support is not under my center of gravity.
Even if your leg is stable, if you have a habit of "jumping" by leaning forward instead of with your horse, you make it harder for him.
Instead, let the jumping movement of your horse carry you along.
At first, accepting this is difficult.
We all like to control everything.
We want things to go right so much that we think it's our duty to jump instead of the horse.
Finding balance is very good; so far we have addressed mistakes.
Now it's time to explain a position that allows you to stay balanced with your horse and be effective in all three phases of eventing.
The key point is to keep your center of gravity above your support.
The center of gravity, or center of mass, is located just behind the navel and in front of the spine and is vertically in the middle of your body.
The support is also the part you rely on to maintain balance, which ideally is your leg.
To keep your center of gravity above this support, you need to reach what I call the base balance position: you close your leg by slightly turning your toe outward and make contact with the back of your knee against the saddle.
To find this position, locate the indentation above the inner part of your calf muscle; right below where the thigh bone meets the shin bone and forms the hinge of the knee joint.
This type of contact with the saddle allows you to take pressure off the inner thigh.
I sometimes tell students to imagine there is a tennis ball between the front of their knee and their saddle.
This leg position makes it so you can no longer push with your knee and hold yourself with your thigh.
Many riders who hold themselves with their knees try to overcompensate for this problem when approaching an obstacle and ultimately fall back, pulling on the horse's mouth with the bit to maintain balance.
Here on the cover rights, I demonstrate this same position: my center of gravity has shifted back, causing my leg to slide ahead of my body.
Since my support is unstable and not directly under my body, I use the reins to maintain my balance.
This bad habit can cause horses to slow down before an obstacle or approach it with improper speed.
This position allows you to truly follow your horse's movement with your leg and pelvic belt — that is, the muscles around your pelvis and lower back.
Allowing this movement enables you to generate energy.
But you have to work on understanding this concept, as humans naturally want to hold themselves with their knee and inner thigh.
Most riders, when they first learn to canter, try to hold themselves on the horse with this incorrect method.
To go into Chaharnal and jump, you need to use the muscles of the outer part of your leg, that is, between the hip and knee and also between the knee and ankle, so that your legs close around the horse like a hinge.
My coach and guide sometimes tells students to imagine that when cantering, "you are binding your knees to the shoulder muscles of the horse."
In addition to the correct leg position, your torso — that is, the abdominal muscles plus the muscles along the spine — plays a vital role in maintaining the center of mass over the legs.
I tell my students that to engage the core muscles, they must consciously bring the middle part of their body closer together and imagine that area takes on a more cylindrical shape.
Another technique I teach is: "Press your abdominal muscles and back muscles towards each other; as if someone is about to punch your stomach hard and you want to resist that blow."
To maintain a balanced position, you should place your center of gravity vertically above your point of support; just as the red line indicates.
Your center of gravity is located between your navel and your spine, and your point of support is in your legs.
Make sure the stirrups are adjusted to the proper length for cantering and jumping.
When you take your feet out of the stirrups and let them hang freely, the bottom of the stirrup should reach your ankle or slightly above it.
To position your foot in a way that allows you to stay balanced with the horse, turn your toes slightly outward and make contact with the saddle behind your knee to secure your foot.
This position allows you to relieve pressure from your inner thighs.
This position also helps you to truly follow the horse's movement with your pelvis using your lower leg and pelvic girdle muscles — that is, the muscles around your pelvis and lower back.
Testing the balance of the stirrup straps for cantering and jumping is recommended when you take your feet out of the stirrups, let them hang freely, and the bottom of the stirrup touches your foot in the ankle area or slightly above it.
To familiarize students with the new balanced position I previously described, I ask them to adjust the stirrup straps two or three holes shorter than their usual length for cantering and jumping.
Then I tell them to go into the two-point position for cantering and jumping.
When they close the angle of their hip joint, I remind them to "focus on opening the knee and thigh, applying pressure with the lower leg, engaging the core, and moving the pelvis slightly back" to keep their center of mass above their point of support.
To test your new balanced position, adjust the stirrup length two or three holes shorter than your usual size for cantering and jumping.
When you go into the two-point position, focus on opening the knee and thigh, applying pressure with the lower leg, and engaging the core muscles.
This helps keep your center of mass over your support.
When getting used to this new balance, you can briefly hook just one finger under the neck strap for assistance.
The reaction is usually immediate; and often accompanied by frustration.
Shortening the stirrups makes pushing with the knee impossible, as there is nothing to lean against and push from, and instead shows riders exactly which muscles they need to use to maintain a balanced position; muscles they may not have engaged much before.
Beginner students often complain that their back and knees feel the pressure of this new challenge well.
Sometimes I fasten a neck strap almost in the middle of the horse's neck and tell students that while learning their balance point and how to use the correct leg muscles and core muscles to maintain it, they can just put one finger inside the strap for a little help; without needing to balance themselves on the reins.
This paragraph also reminds them to shift some of their weight back so that their center of gravity is over their legs.
If the students say their back hurts in the new position, I explain that the reason is that they are using their back to hold themselves up instead of their core muscles.
The solution is to pull the stomach in to support the back.
Building new muscle memory is our ultimate goal in these exercises, which are indeed quite challenging; we aim to replace the muscle memory of an inefficient position and movement in Chaharnal and jumping with a pattern that is truly efficient.
This is an important point because you cannot simply learn not to do something that doesn’t work; unless you replace it with a different action.
So when my students get used to the feel of this new position while standing and at the walk, I ask them to go to the trot.
I usually conduct most of the training in clinics at the trot because there are two beats or two movements in each stride, which makes the riders work twice as hard compared to the canter.
At this stage, when they bring the horse to the trot, they should be able to keep their body position separate from both the up-and-down movement and the side-to-side movement of this gait.
Another advantage is that the trot is not as fast as the canter, so the riders feel more control while making all these changes.
Once you get used to the new two-point position and can maintain your balance along the long side of the arena at the trot, it’s time for an exercise.
I like to set up a number of ground poles at irregular distances.
Some are set for long strides, others for short strides, and I even consider angled paths.
When the horse trots over the poles, my focus is on adjusting the body position and keeping the center of gravity over the point of support.
This exercise helps you learn to control your horse while maintaining this new position.
I often ask students to stay in the two-point position for five or ten strides and then transition to a sitting trot and canter for a few strides, gradually increasing this until they can maintain the trot for 20 or 30 strides in two-point.
When they can maintain their balance along the long side of the arena at the trot, I set up a few ground poles.
We start with regular trot poles set at a standard stride.
Then I move on to something I call "irregular poles"; some poles are set for short strides, some for long strides, and some are even angled.
When the horses start to trot through them, the riders need to adjust their body position to keep their center of gravity over the point of support despite these changes.
This exercise helps them learn to control their horses while maintaining the new position.
The next step is to set up a few simple gymnastics exercises for jumping with the horse at a low height; even as small as 18 inches.
This helps the students understand more precisely where they have specific issues over the jumps.
Many times when I ask a rider, "Did you feel how you fell forward right here?"
The answer is "no."
For the next pass, I film them with my phone to show exactly where and how they need to strengthen their body position.
A different body type: William Fox-Pitt from Great Britain is a good example of a rider whose body type is very different from mine.
Although he is very tall, he has learned to compact his body and keep his center of gravity on his point of support; something that guarantees an effective and balanced four-point position.
Like any change in something that riders have been doing for a long time — even if that way has been incorrect — riding in a balanced base position feels strange for many novice students.
When they engage in this challenge, they say, "This doesn't feel natural at all!"
I also provide immediate feedback; I take pictures of them with my phone, and when I show them their image in the new position, they say, "This is not at all what we felt!"
The reality is that our bodies lie to us.
For example, if — like many of us — you get used to sitting slightly crooked in the saddle, it feels to you like you are sitting straight.
Then when you correct this flaw and sit evenly, your body tells you that you are leaning to one side.
That’s why I recommend students who are working on their sitting position and form to practice with a partner.
Ride with a friend so you can critique each other, or ask a friend to stand by the arena and film you with their mobile phone.
If you can't get feedback this way, try riding in a manege that has a mirror.
Use complementary exercises and music; some sports activities other than riding can help improve body posture.
One of them is skiing, because to do it well, you need to engage your core muscles, rotate your pelvis, and use your pelvic belt; sounds familiar, right?
Another type of exercise that has a direct connection to riding is almost any type of dance training, because the control you gain over your muscles in dance is similar to what you need in riding.
Yoga, which also requires muscle control and balance, is helpful.
Once you learn to maintain this new position for a few minutes each time, one useful method is to ride with music.
I suggest my students put on music that they really enjoy on their personal player and first try to maintain this new position for the entire duration of one song, then two songs, and continue in this manner.
I also use music during my four-point sessions.
This helps me push aside the voices in my head that say I’ve worked enough today and that I’m adequately prepared.
I’m not saying that the balanced base position is the only adjustment in your riding that brings success.
But I do know that most riders, even subconsciously, realize when they have lost their balance.
This makes them feel insecure — and this feeling of insecurity hinders progress.
Correcting body posture brings you one big step closer to maximizing your abilities and those of your horse as a team and reaching your goals.
Center of gravity in dressage: In dressage, you ask the horse to bring its hindquarters more under its body, lift its back and croup, and come onto the bit.
However, when you apply pressure with your knee and as a result, your lower leg swings back and your upper body tilts forward, you block the energy you are creating from behind.
Therefore, this position is like driving with the handbrake on.
With your lower leg, you tell him to move forward, while your thigh, by sticking and gripping, restricts the same energy to support the tilting of your upper body forward.
Ultimately, the horse no longer listens to your subtle aids.
Maintaining balance of the center of gravity on the support surface in dressage is also very important.
When I perform a dressage test with Covert Rights, my foot placement is correct and I follow his movements with my hips to keep his body soft yet energetic.
If I only apply pressure with my knee, my lower leg commands him to move forward, but my stiff thigh — which holds my upper body tilted forward — restricts his energy, sending him contradictory and confusing signals.
Additionally, many riders incorrectly press their legs against the horse to stay stable during flatwork.
A rider who is truly "still" cannot maintain the correct movement along with the horse.
The movement that is seen is one that is in contrast to the horse's movement.
As I explained in "Finding Balance" on page 52, in dressage, you should follow the horse's movement with your hips using a lower leg that is positioned correctly and also with the pelvic belt — that is, the muscles around the pelvis and lower back.
The balanced position in dressage is much more vertical compared to the position in Chaharnal.
The more you strengthen your core muscles, the better control you gain over your sitting position.
This is exactly what you need for effective and as efficient as possible sitting in canter.
About Colin Rattledge Colin Rattledge is an international eventing rider.
He currently holds the record for being the first person to complete all five five-star competitions in the Northern Hemisphere with one horse, Shiraz.
These competitions include the Kentucky Three-Day Event in the United States, the Badminton Horse Trials in the UK, the Burghley Horse Trials in the UK, the Les 5 Étoiles de Pau in France, and the Luhmühlen Horse Trials in Germany.
He and Luke completed all these competitions without penalties in the cross-country section.
In 2015, he made his first appearance on the United States equestrian team riding Covert Rights, a horse bred in their own facility, at the CHIO Aachen World Equestrian Festival in Germany.
His base is in Mount Airy, Maryland.
This article was first published in the May 2017 issue of Practical Horseman.
Source: Practical Horseman – Training