Flying changes: definition, how to ride them, and training the horse
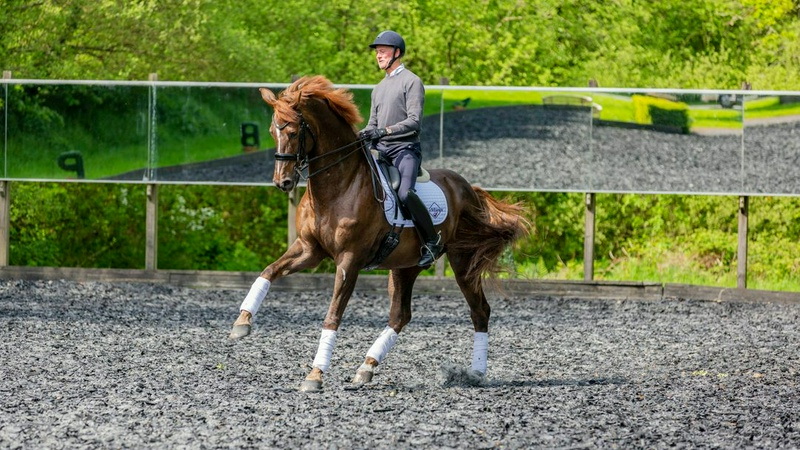
With the right foundations, most horses can learn flying changes.
Flying changes are undeniably fascinating.
I still remember the first time I tried to do this - I asked my friend to film me with her old mobile phone, and I was smiling broadly at the camera while my little horse landed his jump and went off quickly.
For now, let’s ignore that he was two strides behind.
But without a doubt, these changes can seem mysterious until you experience that “aha” moment and finally figure it out.
And because every horse is different, there is no completely perfect method for training them.
The good news is that there is no magic involved.
The flying change is a natural movement - your horse does this freely in the field - and with the proper basics, most horses can learn to do it on command (and in the process make you look properly impressive).
Here we explain what a flying change is, how to ride it, and how you can begin teaching it to your horse without throwing all your body weight to one side.
What is a flying change?
A flying change is when your horse, while cantering, smoothly changes his leading leg without going into trot or walk.
One step back may be helpful: in canter, your horse is on one leading foreleg - this leg reaches farther forward than the other and you feel that shoulder moving under you.
On the left lead, the left foreleg is leading; on the right lead, the right foreleg.
Which leg is leading matters for balance, especially on turns and circles, where you usually want the inside leg to lead - so moving to the right, most of the time the right leg is leading, and moving to the left, the left.
Canter has a three-beat rhythm, and after the third beat there is a brief moment of suspension - a short instant when all four feet are off the ground and your horse is momentarily in the air.
The flying change happens in that moment.
Your horse switches his legs in the air and lands on the opposite leading leg, so instead of leading with the left foreleg, he is now leading with the right foreleg.
If done well, there is no slipping and no change in rhythm - just a clean jump from one lead to the other, as if your horse jumped in the air.
You will encounter flying changes in almost every discipline: Dressage: they appear from advanced medium level and above, on straight lines and at higher levels, in sequences where every stride has a change (temp changes).
Show jumping: essential for flowing from one line to another.
A horse that lands on the correct leading leg - or changes to it - can balance through turns and reach the next fence in rhythm without losing time or extra effort.
Eventing, showing, and general riding: anywhere you are cantering, turning, and need your horse to be balanced, the change of lead keeps everything tidy and easy.
For a lower-level rider, the issue is more about control than creating an impression - though that is interesting too.
A horse that changes on your request is a horse you can balance and guide, whether in a jump turn, on the dressage center line, or even in hunting.
How to ride a flying change assuming your horse already knows how to change leads (for teaching it, see the next section), here is the sequence of aids.
The key point is that the change should be prepared, not done suddenly—you prepare your horse and then ask.
1.
First establish a good canter.
Balanced, active, and collected enough that you feel you could go a few smaller strides at any moment.
A flat, lengthened canter leaves nowhere to change from.
2.
Prepare on the line of change.
Sit straight, half-halt to collect and balance the canter, and make sure your horse is straight—not falling in or out through the shoulder.
3.
Change your leg position.
Assume you are on the left lead (left foreleg leading) and want to change to the right.
Your left leg, which has been by the saddle, goes behind the saddle and your right leg comes to the saddle.
This new leg position tells your horse which lead you want now.
4.
Change your weight and seat.
As you change your legs, let your seat and pelvis follow too—so your weight shifts smoothly to the new side.
Do this quietly; it is only a rebalancing, not throwing yourself into the saddle.
5.
Ask at the moment of suspension.
Apply the new outside leg (left, now behind the saddle) with a clear but light aid, ideally as your horse is preparing to spring into the next stride.
This is when your horse can move the legs into the new lead.
6.
Ride forward.
Ride energetically out of the change onto the new lead.
The common mistake is to ask and then stop or pull the rein— we have all done it, but both prevent your horse from making a clean leap.
The rhythm you want is roughly: “Prepare...
now go!”
A change asked for in one smooth motion usually comes late or flat; a change that has been prepared first has time to pass through the body.
How to teach a flying change before you teach the change itself, the foundations must be solid—that may not be exciting, but it is the most important part.
Rushing to change before these are in place is the most common reason for mistakes in changes.
Your horse must be able to: pick up either canter lead promptly from a clear aid, in a straight line.
Make balanced transitions from walk to canter and from canter to walk without falling onto the forehand.
(“On the forehand” means your horse is carrying too much weight on the front end, instead of pushing from behind.
You will feel this as heaviness in your hands, or the horse wanting to rush forward or lean on the reins for balance.
What you want is for your horse to stay light in front and bring the hind legs under the body—think of going up, not down.
) Hold the counter-canter (canter on the “outside” or “wrong” lead) in balance.
This teaches your horse to stay on the lead you asked for and not change whenever it feels like it.
Once these are established, here is a simple and reliable way to introduce the change: 1.
Use a change of direction.
Ride a shallow circle, figure eight, or change of direction across the diagonal – anywhere your horse naturally bends and changes direction, so the change of rein makes sense to him.
2.
Establish a clear trot, then restore balance.
As you approach the point where you will change direction, half-halt and collect the trot so your horse is balanced and attentive.
3.
Ask at the moment you cross the line.
At the instant you change direction, change your leg and seat position and apply the new aid.
Because your horse is already changing direction, changing rein feels logical.
4.
Reward the effort.
Even a first, untidy change – or one that is “behind the stride” (the forelegs change but the hind legs lag a stride behind) – is worth rewarding.
You are first building understanding; tidiness comes with practice and strength.
5.
At first, keep it occasional.
Ask once, pay attention to your horse, and continue.
Repeated change exercises often make horses tense or anticipate.
A few good attempts in a session are enough.
If your horse is truly confused, some riders use a long pole or a cavaletti on the change line to encourage your horse to jump it and change behind – but I would say use that sparingly at first, and only if simple riding does not work.
Above all, if the initial attempts are untidy, do not worry.
Late, flat, or overexcited changes at first are completely normal.
They will clean up as your horse’s balance and confidence improve – which, as any good trainer will tell you, is really where everything lives.
html Looking at the next fence causes a natural shift in body weight.Credit: Lucy Merrell Preparing to execute a full half-pass