6 ways to extend the duration of show jumping with horses
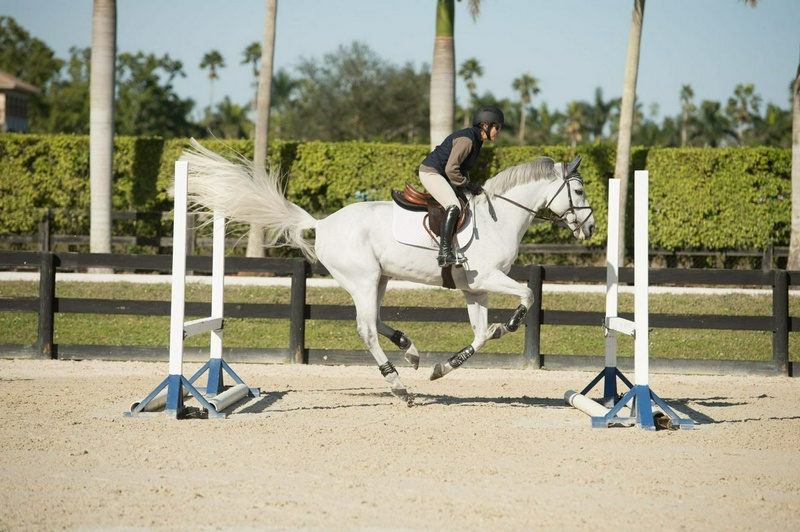
My number one priority has always been the horse.
I am constantly looking for new ways to extend the active life of my horses without them becoming mentally or physically exhausted.
I avoid excessive and repetitive training; not only to prevent unnecessary stress on their legs but also because I want them to remain interested in their work with the freshest and most spirited mindset possible.
Together with my husband, Steve Engel, a veterinarian, I attend veterinary conferences to stay informed about the latest scientific findings and methods for strengthening and preparing horses; methods that help their physical abilities and reduce the risk of injury as much as possible.
I also pay attention to the methods used by trainers in other disciplines.
6 keys for longer durability are some of the most important lessons I have learned: 1.
Minimize impact forces.
Over time, impact pressures can lead to injury in the hooves, joints, tendons, and ligaments of my horse.
The higher the jumps, the greater this pressure becomes.
For this reason, shorter obstacles are the best option for training sessions.
2.
Avoid excessive repetition.
Just as repetitive movements in humans can lead to tendonitis, in horses, it can lead to muscle fatigue, and as a result, the body's structures gradually suffer wear and tear.
This can be challenging in disciplines like show jumping, where a certain amount of training is essential for the progress and skill development of both horse and rider.
If you do not train at all, you and your horse may lack the strength and timing needed to perform at your best without jeopardizing physical health.
Therefore, there is a very delicate balance.
Some training is essential, but you must change the training before your horse becomes sore or bored.
Margie Engel, an Olympic show jumping rider and a member of Team Prac, avoids excessive and repetitive training of her horses to prevent unnecessary stress on their legs and to keep the horses eager to work with the freshest and best possible spirit.
3.
Target the whole body.
Excessive focus on one part of the body ultimately leads to compensation in other areas.
For example, if you always ask the horse to land on a specific lead, the muscles on one side of its body may become fatigued.
As a result, it tries to shift the load to the other side of its body.
Many lameness issues arise precisely from this.
The stronger your horse's whole body is, the less risk of injury it will have.
Therefore, choose exercises that engage both sides of its body equally while also strengthening the abdomen, back, neck, and other areas.
4.
Use interval training and cross-training.
Eventing riders perform particularly well in interval training.
They know how to raise the horse's heart rate, maintain the intensity of the exercise for a moment, and then reduce the pressure to allow the heart rate to come back down.
Gradually increasing the number of these interval "sets" improves overall strength and fitness.
I also incorporate Chaharnal into the routine programs of my show jumping horses; not only to improve their adjustability and make it easier for them in this step but also to increase their respiratory capacity.
Dressage is an excellent complementary exercise and a very effective way to enhance rideability and responsiveness.
All horses must learn the basics of dressage.
If you can reach more advanced levels, gradually adding collected movements to your jumping horse's program will strengthen different muscles than those he typically uses.
When Liza Wilcox rides my horses, it feels like I’ve sent them to a gym: she makes them work from their hindquarters in short, repetitive bursts; something akin to the equine equivalent of a squat movement in humans.
5.
Work on different surfaces.
Riding your horse on varied terrains, from sandy arenas and grass arenas to natural trails, hills, and even hard surfaces, strengthens different structures of his body and helps him feel comfortable in various types of competition and training ground.
This is also very beneficial for his mental health.
6.
Whenever possible, repeat exercises in both directions.
Horses' brains do not work exactly like ours.
When you perform an exercise and then approach it from the opposite direction, it’s as if they are facing something completely new.
If you can execute a lesson from both sides, you will always get the most out of it.
I design my training sessions with all the above principles in mind.
Next, I will present three exercises that I use to keep my horses' program fresh and effective.
Exercise 1: Football Grid Setup: You can use any equipment that allows you to raise a cavaletti from just one side.
I have boxes that I can rotate to create different heights; 6 inches, 8 inches, 10 inches, and 12 inches.
Jump standards are also suitable, provided their holes go down to a height of 6 inches.
Place three or four poles about 3 to 3.5 feet apart; for larger horses, this distance can be up to 4 feet; and place a block or standard next to each pole.
The benefit of this exercise: This exercise reminds me of the tires that football players weave through to improve agility and coordination.
For horses, this strengthens the top line of the body, engages the hindquarters, increases the suspension of movement, helps regulate rhythm, and gives them better awareness of their foot placement.
At the same time, it improves body alignment and enhances the rider's connection with their hands on the horse.
How to execute the ride: In the first few passes through the grid, keep both ends of each pole on the ground so that they are just regular trot poles.
Approach them in an active and collected sitting trot.
(Sitting trot is ideal because it gives you the most control over the horse's rhythm and forward drive and provides the best feel for what he is doing underneath you.
But if you are still not comfortable with sitting trot, a light trot is also perfectly suitable.)
Keep your legs down and close to the horse's sides so you can feel his hindquarters and back working.
Imagine sending his hind legs forward while simultaneously creating more suspension in his steps, asking him to come towards the ground poles with an active rhythm.
This exercise strengthens the horse's top line, engages his hindquarters more, increases the suspension of movements, helps regulate rhythm, and improves his awareness of where his feet are placed.
In the trot, pass straight through the center of the poles, then change direction, make a circle, and pass through them again from the other side.
Change direction again; this time turn towards the opposite side after the poles (if you turned left on the previous circle, turn right on this one) so that you eventually ride in a pattern resembling the number eight over them.
Focus on riding with a very precise path: stay straight while approaching, when passing over the poles, and then execute turns with the appropriate bend.
Use the end of the arena to maintain the maximum amount of straightness each time you approach the exercise.
Correction: If your horse gets nervous or tries to rush over the poles, bring it back to a walk, remove one or two poles (from the beginning of the row and/or the end, so that the distance between the remaining poles remains 3 to 3.5 feet) and pass over the remaining poles very slowly and deliberately.
This teaches it to place its feet between the poles.
When it does this well, return to the trot and approach the poles in a very calm and controlled manner.
After a few successful repetitions, put the pole or poles back in their original position.
Increasing the difficulty level: When the horse is comfortable with the ground poles, raise one end of each pole alternately; so that one end remains on the ground and the other end is elevated with a block or stand at the lowest height.
For example, raise the first pole from the right, the second pole from the left, and continue in this manner.
Approach this row in the same way and, if possible, do this while sitting in the trot.
Maintain your connection with your legs and hands so the horse understands it still needs to step over the bars, not jump over them.
Repeat this exercise several times in both directions, encouraging it each time it does it correctly and giving it enough walking breaks between repetitions.
Then, if it seems really comfortable with the exercise, raise the ends of the poles to the next height.
In the first session, do not exceed a height of 8 inches.
If its first experience was good and it worked with confidence and coordination, you can start the next session from where you left off and gradually increase the height and/or add more poles if you wish.
Also, if you feel secure in the saddle, try this exercise a few times without stirrups.
Remember not to overdo the repetitions of this exercise.
When it seems your horse has understood the exercise, just repeat it a few more times and then move on to something else.
Then incorporate it into your flatwork; for example, work on lengthening and shortening the stride, lateral movements, counter transitions, and similar exercises between different passes over the poles.
Exercise 2: Double Bounces Setup: Place three small cross rails 9 to 10 feet apart from each other.
You can also set up each jump as a single pole; so that one end is elevated and the other end is on the ground like in Exercise 1.
If you and your horse are more experienced, arrange the jumps as small verticals that do not exceed 2.5 feet in height.
If your horse naturally has a larger stride, increase the distance between the jumps to 11 feet.
Place a ground pole on either side of each jump as well.
This exercise helps the horse better understand distance and prevents it from crossing the appropriate distance.
Caution: Only perform this exercise with a horse that is experienced and already familiar with bounce jumps.
Why it is useful: Like the previous exercise, this one is also very effective for improving the alignment of movement and rhythm, while also placing the horse more on its hindquarters and making the front hand reaction faster.
It also helps shape its jump arc correctly over the center of the obstacle.
Additionally, it teaches the horse to learn from its mistakes and to collect itself before jumping so that it neither crosses the appropriate distance nor gets too close to the obstacle when taking off.
In the meantime, you can also focus on your own body position and balance.
How to ride: Approach the bounces with a collected canter and make sure your horse is moving in front of your leg.
In this exercise, being a little closer to the jumps is better than being too far forward.
When you reach the first jump, let it be on its own to focus on its task.
The less you interfere with it, the better.
Throughout the exercise, maintain your two-point position and allow the horse to jump up and close the angle of your hip joint over each obstacle.
Jump the bounces from both directions.
When this goes well, you can gradually add one or two more jumps.
This "double bounce" exercise teaches the horse to learn from its mistakes and to collect itself before jumping so that it does not cross the appropriate distance or get too close to the obstacle when taking off.
Correction: If the horse gets quick on the bounces, think and act with your body as if you are slightly behind the movement and gently slow it down using your weight—not your hands.
If your horse is young and you want to enter this exercise at a trot instead of a canter, place a ground pole 7 to 8 feet from the first obstacle to help it reach an appropriate point for takeoff.
Then place another ground pole 9 to 10 feet after the last obstacle.
With this setup, jump the exercise in only one direction so that the trot pole is at the beginning of the path, not at the end.
Exercise 3: This in-and-out setup: Place a small vertical obstacle 21 to 22 feet from a small oxer.
Place ground poles on both sides of each obstacle.
Add another pair of ground poles in the middle of the exercise, perpendicular to the obstacles, to create a straight corridor for your horse to canter through.
Some horses may spook when they see these poles for the first time, so initially place them 10 to 11 feet apart.
Benefit of this exercise: This final exercise still emphasizes straightness while helping you focus more on body control and reminding your horse to collect itself and shift its weight back when taking off for the jump.
How to ride: Approach this in-and-out with a working canter and first jump it in the vertical direction to the oxer.
This distance should be comfortably rideable, although you may need to engage your leg more after the vertical obstacle to ensure your horse's next jump peaks exactly over the center of the oxer.
When your horse jumps this in-and-out well in that direction, approach it from the opposite direction.
There may be a slightly compressed feeling in this direction, so after you help him pass through the oxer with your lower leg, stay calm in the saddle so he can understand the exercise himself.
Let the jumps collect him.
More than with your hands, help him with your body control; that is, open the angle of your hips and keep your upper body a bit straighter and taller.
This exercise "in-and-out" continues to emphasize straightness and reminds your horse to collect himself and shift his weight back when taking off for a jump.
Change the direction of this exercise a few times to better feel the difference in riding style from vertical to oxer and oxer to vertical.
Correction: In the meantime, if your horse has trouble staying straight, gradually bring the vertical ground poles closer together until they are about 8 or 9 feet apart.
If his drifting issue is serious, set these poles at a slight "V" angle and bring their ends a little closer together in front of the take-off point of the second jump, but no less than 3 feet apart.
At this stage, jump this in-and-out only in this direction; or ask someone on the ground to reset the "V" shape each time so that its narrower end is always facing the second jump.
Increasing the difficulty: If you are a more experienced rider and this exercise is going well for you, practice it without stirrups and/or tie your reins together and place your hands on your hips or spread them out like airplane wings while passing over the jumps.
This will help you reduce your dependence on your hands and instead focus on your body position and balance in the air.
Summary remember that your horse's well-being should always be a priority.
Keep training sessions fun and varied, without overdoing it; so that both of you eagerly look forward to the next turn.
About Margie Engle Margie Engle.
A member of the Prac team, Margie Engle has been one of the most decorated show jumping riders in the United States for over three decades.
To date, she has won over 250 Grand Prix classes, 6 World Cup qualifying rounds, more than 75 Nations Cups, and 10 American Grand Prix Association Rider of the Year titles, which is a record, and she was also inducted into the Show Jumping Hall of Fame in 2021.
She competed in the 2000 Olympics, won a team silver medal at the 1999 Pan American Games, a team gold and individual bronze at the 2003 Pan American Games, and earned a team silver at the 2006 World Equestrian Games.
Margie and her husband Steve Engle, a veterinarian whom she has been married to for 30 years, are based at Glade Winds Farm in Wellington, Florida.
Source: Practical Horseman – Training