Learn Chaharnal safely and confidently.
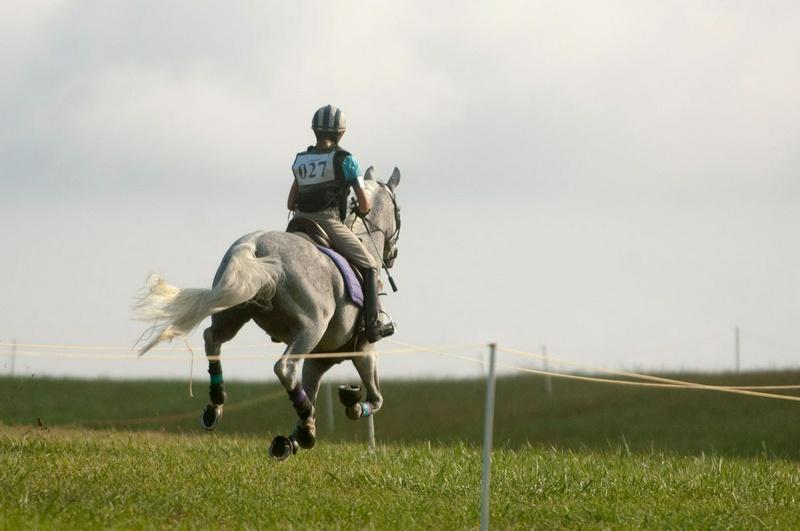
Now that I think about it, I have spent a significant part of my life — at least the important parts — in Chaharnal.
My earliest memories are intertwined with horses, and most of these memories are associated with speed.
Until 1878, riders had differing opinions about the mechanics of the gallop.
Some said that the horse always has at least one foot on the ground, while others believed there is a moment when all four of the horse's feet are off the ground.
A narrative, the historical accuracy of which is uncertain, states that the following series of photographs were taken to settle a bet by Leland Stanford, the famous businessman and former governor of California; he hired a photographer named Eadweard Muybridge to capture a horse in full gallop.
The mare Sally Gardner, ridden by a jockey named Dan at a speed of about 36 miles per hour — and other names of hers have been forgotten over time — helped to resolve this question.
Muybridge used a primitive version of stop-motion photography to prove that in a gallop, there is a phase of flight; that is, a transitional stage in which the horse has no contact with the ground.
These photographs were taken at the training track of Stanford's horse breeding farm in Palo Alto, California; a place that is now the campus of Stanford University.
Next, I will briefly explain the mechanics of the gallop and step by step describe how to ride safely and at high speed.
I will also provide insights about body position in the gallop and explain how to use the reins; when it is necessary to collect your horse to reduce its galloping speed.
I value the mechanics of my gallop for my horse's other three gaits as well: walk, trot, and canter.
My father, quoting a training principle from the U.S. cavalry, said that a rider should "walk for muscle building, trot for balance, and gallop for breath."
Each of these gaits has its own application, and undoubtedly, one can also improve a horse's respiratory capacity with the canter; however, the canter and gallop are two completely different gaits in terms of mechanics and speed.
Mechanically, the canter has three beats followed by a period of suspension.
For example, when we say a horse is cantering on the left lead, we mean that its left front foot, or the "leading foot," is the last to touch the ground.
The sequence of footfalls in a left-lead canter is as follows: first the right hind foot, then the left hind foot, and the right front foot simultaneously as a diagonal pair touches the ground, and finally, the left front foot makes contact with the ground; after that, a period of suspension occurs.
The scientific term for this suspended phase in the canter is "unsupported transition."
In contrast, the sequence of movement in the gallop consists of four beats followed by a period of suspension.
Equestrians, like in the canter, describe the horse in a gallop on a "lead"; this lead is determined by the front hoof that touches the ground last, meaning in the left lead, the left front leg is pulled ahead of the right front leg.
The order of hoof landings in a horse galloping on the left lead is as follows: right hind foot, left hind foot, right front foot, left front foot; and then a period of suspension where all four hooves are off the ground.
More than a century after Muybridge's photographs proved the existence of the gallop in Chaharnal, the Royal Veterinary College in London continued this early scientific research with a series of studies to determine the most efficient galloping position for the rider.
You can see the results of these studies here.
The sequence of movement in gallop is four beats, followed by a period of suspension.
In gallop, just like in canter, we describe the horse based on the "lead"; the lead is determined by the front hoof that makes contact with the ground last.
Boyd Martin, a four-time Olympic rider, showcased this collection of gallop photographs at his Windora farm in Cochranville, Pennsylvania.
Thanks to science, we now have a more complete understanding of both the horse's movement in gallop and the rider's body position in gallop that creates the most coordination with the horse.
Depending on the quality of the strides and the body structure of each horse, it changes from canter to gallop at about 600 meters per minute, or nearly 20 miles per hour.
Generally, the maximum speed that a horse can reach over a short distance is 44 miles per hour.
If you have been reading my columns for a while, you surely know not to believe everything you read without question; however, at least you can reassure yourself that regardless of how fast you think you are moving, you are actually only going at about half of the maximum possible speed of horses.
Of course, this reassurance is not that great, but the reality is what it is.
Safety in gallop is good; now you know what gallop is; what is the next step?
Since I want you to be safe and confident, we need to talk about your body position before you actually go into a gallop.
But even before that, we need to discuss the importance of acting thoughtfully and cautiously for your first galloping experience.
If you have never galloped before, you should absolutely not borrow your friend's 4-year-old thoroughbred horse that has just come out of a race and ride it "for a short gallop"; because by doing so, you may put yourself in a dangerous position.
Most likely, if you survive a terrifying experience of losing control of the horse, you will never ride outside the confines of the riding arena again.
To maintain safety, your first galloping experience should be on a horse that can be brought to a gallop with leg pressure, but calms down as soon as you release the pressure.
If this is your first experience riding outside the arena, or if you have only ridden at a walk on trails until today, you should proceed with the process of "learning to gallop" patiently and slowly.
Your first galloping experience should be on a horse that can be brought to a gallop with leg pressure, but calms down as soon as you release the pressure.
It is also not recommended to have another horse galloping alongside you at the same time, as even calm horses can become excited when accompanied by another horse during gallop.
In that case, you might suddenly enter a spontaneous race, while the goal of this exercise is not that at all.
Before I introduce you to gallop, I will first ensure that you have sufficient skill in trotting and cantering in a large field.
The hayfield between my stable and my house is about 35 acres in size, and I have always found it sufficient for this purpose.
You may be one of those riders who have very little experience outside the confines of the arena or have no experience at all, and before continuing the lesson, you need to mentally adapt to these conditions.
Learn to assess your speed and find a suitable place for Chaharnal that has enough space for the wider turns you will need; turns that you will require over the next month as your speed increases.
I assume that the ground of your arena is very suitable underfoot and that there are no hazards like stones or animal holes; because the fastest way to cause a sound horse to go lame is for its foot to go into a hole or to go Chaharnal on unsuitable ground.
Measure a 400-meter "speed trap" in your Chaharnal area and mark the beginning and end of this measured distance.
Make sure you can clearly see these markers as you approach.
(I use meters, not yards or feet, because most competitions for which I prepare riders are held using metric measurements.)
I consider 400 meters as the starting distance for the speed trap because this speed is a fast pace in show jumping, and most riders feel comfortable cantering at this speed.
So far, everything is relatively simple, right?
But wait a moment; although 400 meters per minute is not much faster than what you are used to, you need to shorten your stirrups by about 1 inch.
You should be able to maintain your two-point position; a position where your seat is above the saddle while being close to it, without resting your toes on the horse's neck for balance.
After adjusting the stirrup leathers and while the stirrup leathers are positioned vertically, test yourself in a standing position: rise from the saddle, just as you sit and rise in a light seat, then pause at the highest point of that movement.
Now place your hands in front of your chest on top of each other and try to remain in that balanced position for as long as possible without using your hands for balance.
It is very important to be prepared both mentally and physically for riding at speed, and riding with shorter stirrups helps improve your physical readiness for Chaharnal.
Doing this is harder for you than it is for me to express.
It is very important to prepare both mentally and physically for riding at speed, and shorter stirrups help you improve your physical fitness.
The reason is that shorter stirrups cause your thigh and lower back muscles to tire much faster than usual.
When you have adjusted the stirrups to a shorter length, move back and forth within the speed measurement area at a canter and record the time for each practice; the speed of 400 meters per minute should take 1 minute.
You may need to teach your horse to accelerate in this section, rather than just going at a normal canter.
Remember that learning to Chaharnal at a faster speed is a gradual and time-consuming process.
Once you can accurately cover the 400-meter speed measurement area in 1 minute at a canter, measure a new speed measurement area at another point in the arena with markers spaced 450 meters apart.
You must try to cover this distance in 1 minute again.
(Here you can see a process that I use to improve your ability to ride at speed.
) Every time I ask you to move faster in the speed measurement range, shorten the stirrup leathers by another 1 inch; that is, for every 100 meters per minute increase in speed, shorten by 1 inch, up to a maximum of 600 meters per minute.
The faster you go in Chaharnal, the shorter you should ride and the more you should close your hip angle to stay in sync with the horse's movement.
Your horse will likely get used to the speed measurement ranges and will anticipate them, so you need to teach it to wait before re-entering the faster range.
Try to stay one step ahead of it both mentally and physically.
Using the pulley rein, keep in mind that your horse will become more prepared during this process, and this increased physical readiness may manifest in its other activities as well.
Horses that previously went on beginner-level cross-country courses with a free rein may suddenly become lively and show a lot of interest in this discipline.
This can be enjoyable, but with the change in the horse's behavior, you must also adjust your training method accordingly.
That’s why I want you to know how to use the pulley rein, as this tool is very useful when you encounter difficulties controlling your horse's speed.
The pulley rein is a very powerful aid and should only be used in emergency situations.
To execute the pulley rein from the left side, place your right hand firmly on the horse's neck.
At the same time, press your left hand straight down towards the horse's left shoulder and then bring it straight back towards your left hip bone.
When the horse responds to this aid by slowing down, soften the rein pressure to reward the correct response.
Before trying this at a gallop, practice it first in the arena at a slow speed and make sure you have equal skill with both hands.
If your horse does not respond to your usual aids for slowing down, shorten the reins a bit, place your left hand firmly on the horse's neck and in front of its withers, and press your left hand towards its right shoulder.
At the same time, bring your right hand straight back towards your right hip.
When the horse slows down, be sure to reward it by softening the reins so it understands what you want from it.
The single bridge or single cross has an easier adjustment than the double bridge.
For this reason, I usually recommend this method instead of doubling the reins.
In the single bridge, you hold both reins in one hand and one of the reins in the other hand.
Adjust the reins so that your thumbs almost touch.
In this picture, the rider's hands are raised to show the single bridge position, but when using it, you should place your hands firmly on the horse's neck.
Make sure the horse pulls against itself rather than against you.
I teach riders to use the double cross, also known as the double bridge, when they have to ride a horse at a gallop that heavily leans on the bit.
"Double" means the rider has both reins in both hands.
Adjust the reins so that the distance between the hands is minimized.
To demonstrate this technique, this rider has raised their hands, but when using the double bridge, you should firmly place your hands on the horse's neck.
When you establish this position, the horse quickly realizes that it is pulling against itself and often calms down and finds a steady rhythm.
In summary, I hope you soon experience the pleasure that riding at speed gives to a person.
I love everything related to horses; from training them in dressage to teaching them to maintain calm and balance in show jumping rounds and introducing them to their first experience of crossing water.
But I only find the complete sense of freedom when my horse and I are away from everything and galloping towards an invisible horizon.
Every time it floats in the air, I momentarily escape from problems; free from strict coaches and dissatisfied people, free from flat tires and the heavy costs of truck repairs, free from the laws of gravity and speed, and free from earthly limitations.
For more reading, click here for Jim Wofford's article on the science of galloping.
His note on how speed in cross-country magnifies mistakes is also available here.
You can also read all of the late Jim Wofford's articles in Practical Horseman here.
About Jim Wofford: the late Jim Wofford along with his loyal partner at Fair Hill International 2019.
Jim Wofford, a veteran columnist for Practical Horseman, competed in three Olympic Games and two World Championships.
He also became a five-time national champion of the United States.
In addition, he was a highly respected coach.
Since 1978 and for several decades, at least one of his students was present in all Olympic, World Championship, and Pan American teams of the United States.
He passed away on February 2, 2023.
You can read our article titled "In Memory of Jim Wofford" here.
This article was first published in the January 2017 issue of Practical Horseman.
Source: Practical Horseman – Training